Christmas Show Overview - 2022 Edition
I've been asked a few times how the system works, how to create a new display, and other questions about the tech behind the light show. In response, this post will be an overview of the system, giving a bit more detail about how everything works together. For those starting out, this isn't really a step-by-step guide since your own tastes, budget, and display area will be different to mine, but it should give you enough perspective for a good start on your own display.
For a broad overview of what components there are in a display and what roles, they play, I wrote a post which fills that role. It's been a while since I posted it, but the content there is still relevant. I'll be going deeper on the concepts I presented in that post, so if you feel lost or want a primer first, feel free to check it out!
Note: this is going to be a long article, so get comfy!
Props
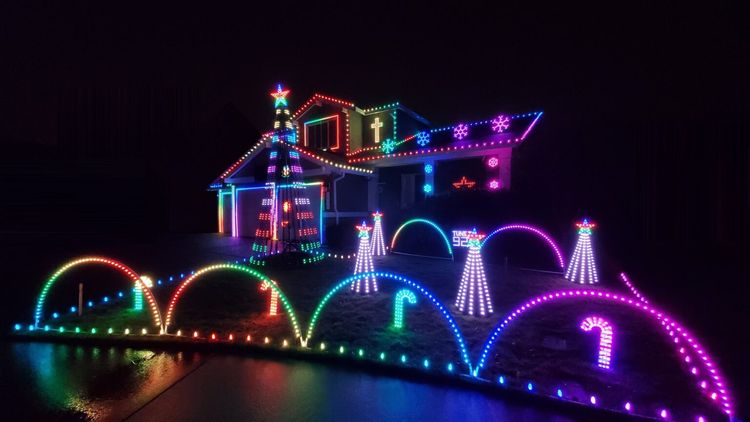
There are a total of 49 props on my house of various sizes and shapes:
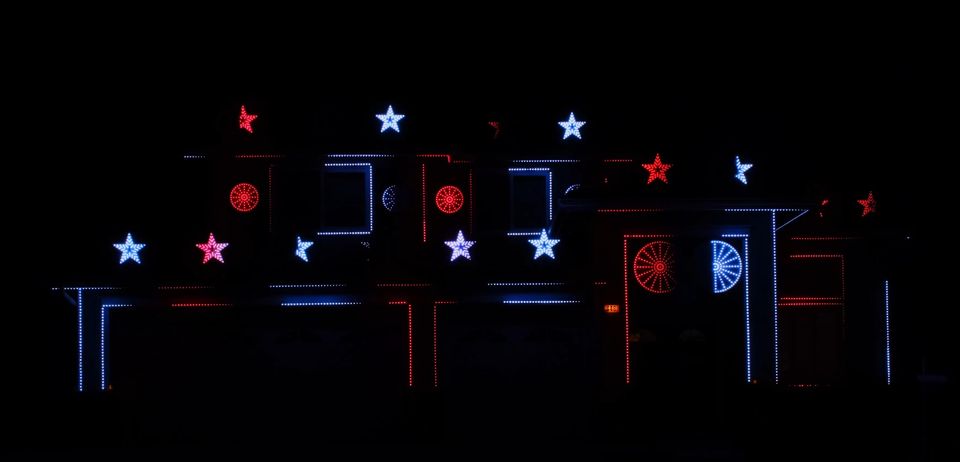
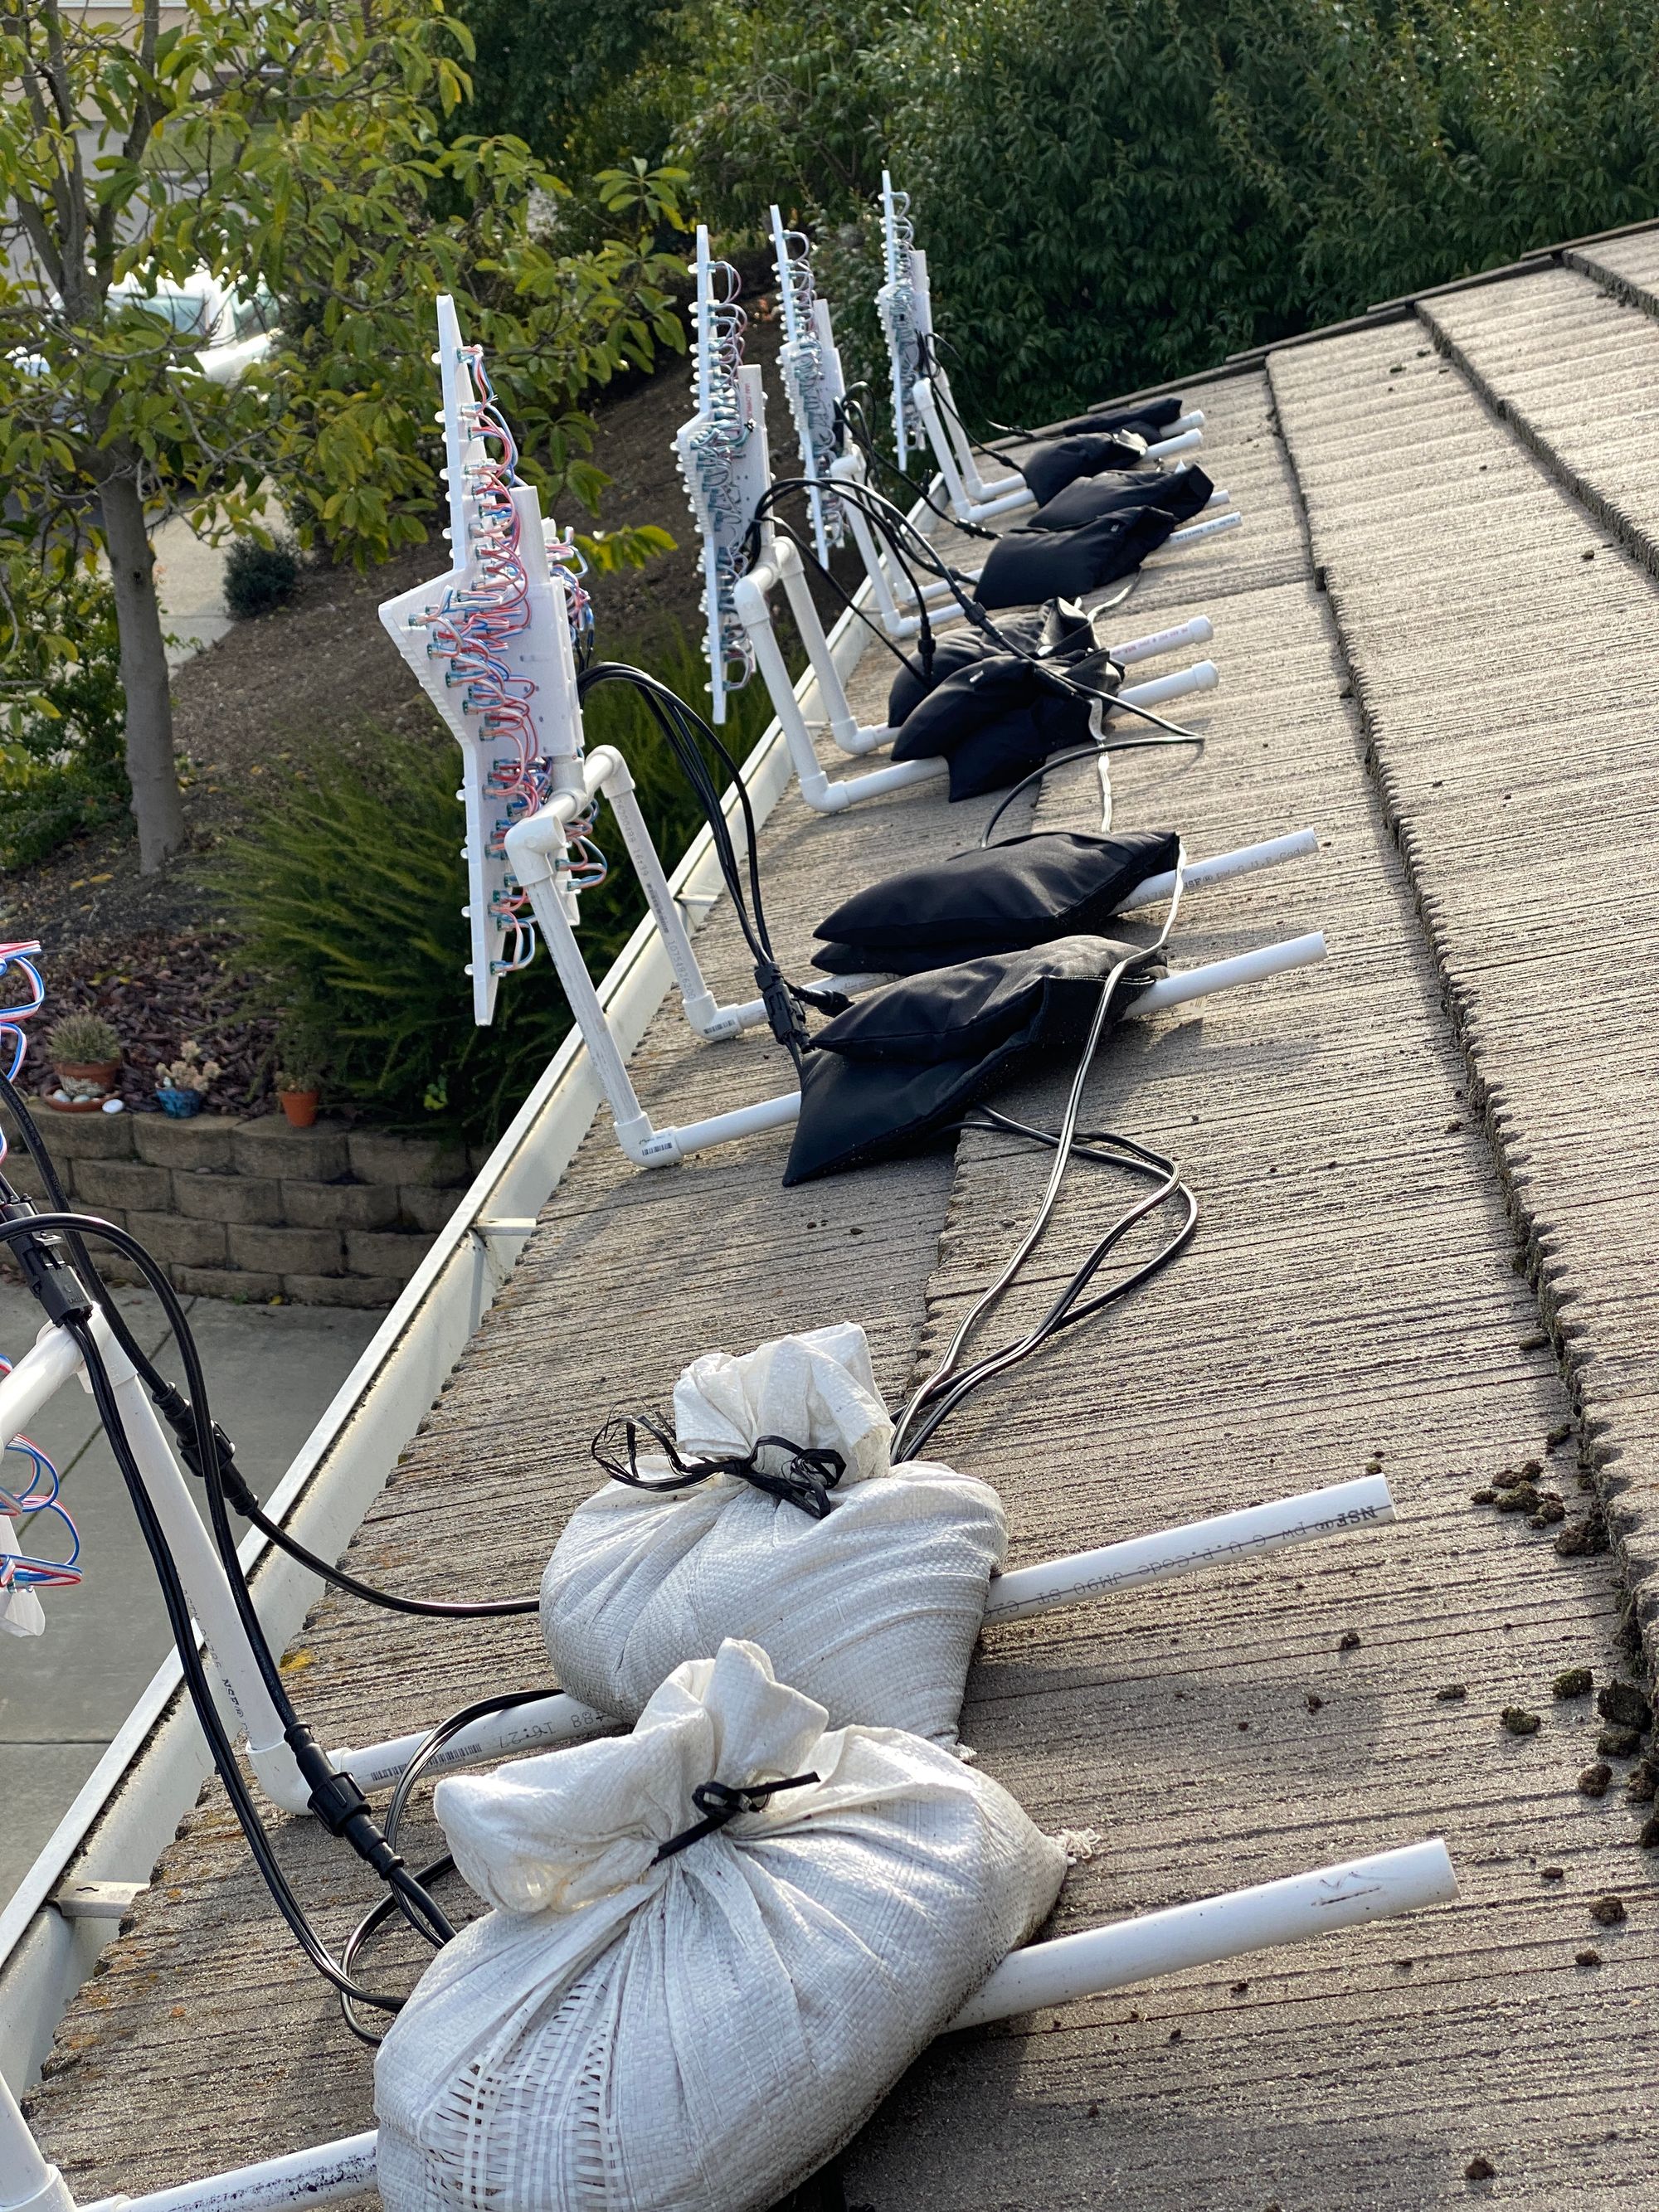
- 15 stars, each with 90 pixels
- 4 22" spinners, each with 85 pixels
- 2 36" spinners, each with 193 pixels
- 4 windows, each with between 70 and 102 pixels
- 3 permanently installed runs on the eaves, with a combined 602 pixels split over 8 props
- 16 other house outline runs with a combined 658 pixels
All together, that makes 4080 pixels in this display. That's fewer pixels than I had last year, despite having a larger house (and is also something I'm going to remedy for next year :-p)
When it comes to the data and power connections into and out of the props, there are two different categories of props which describe the connections therein: shapes and lines. While I am not going to get hyper detailed about each of these (I'll make a post about each type, how I wired them, and why I did so), I'll go over some basics.
Shapes
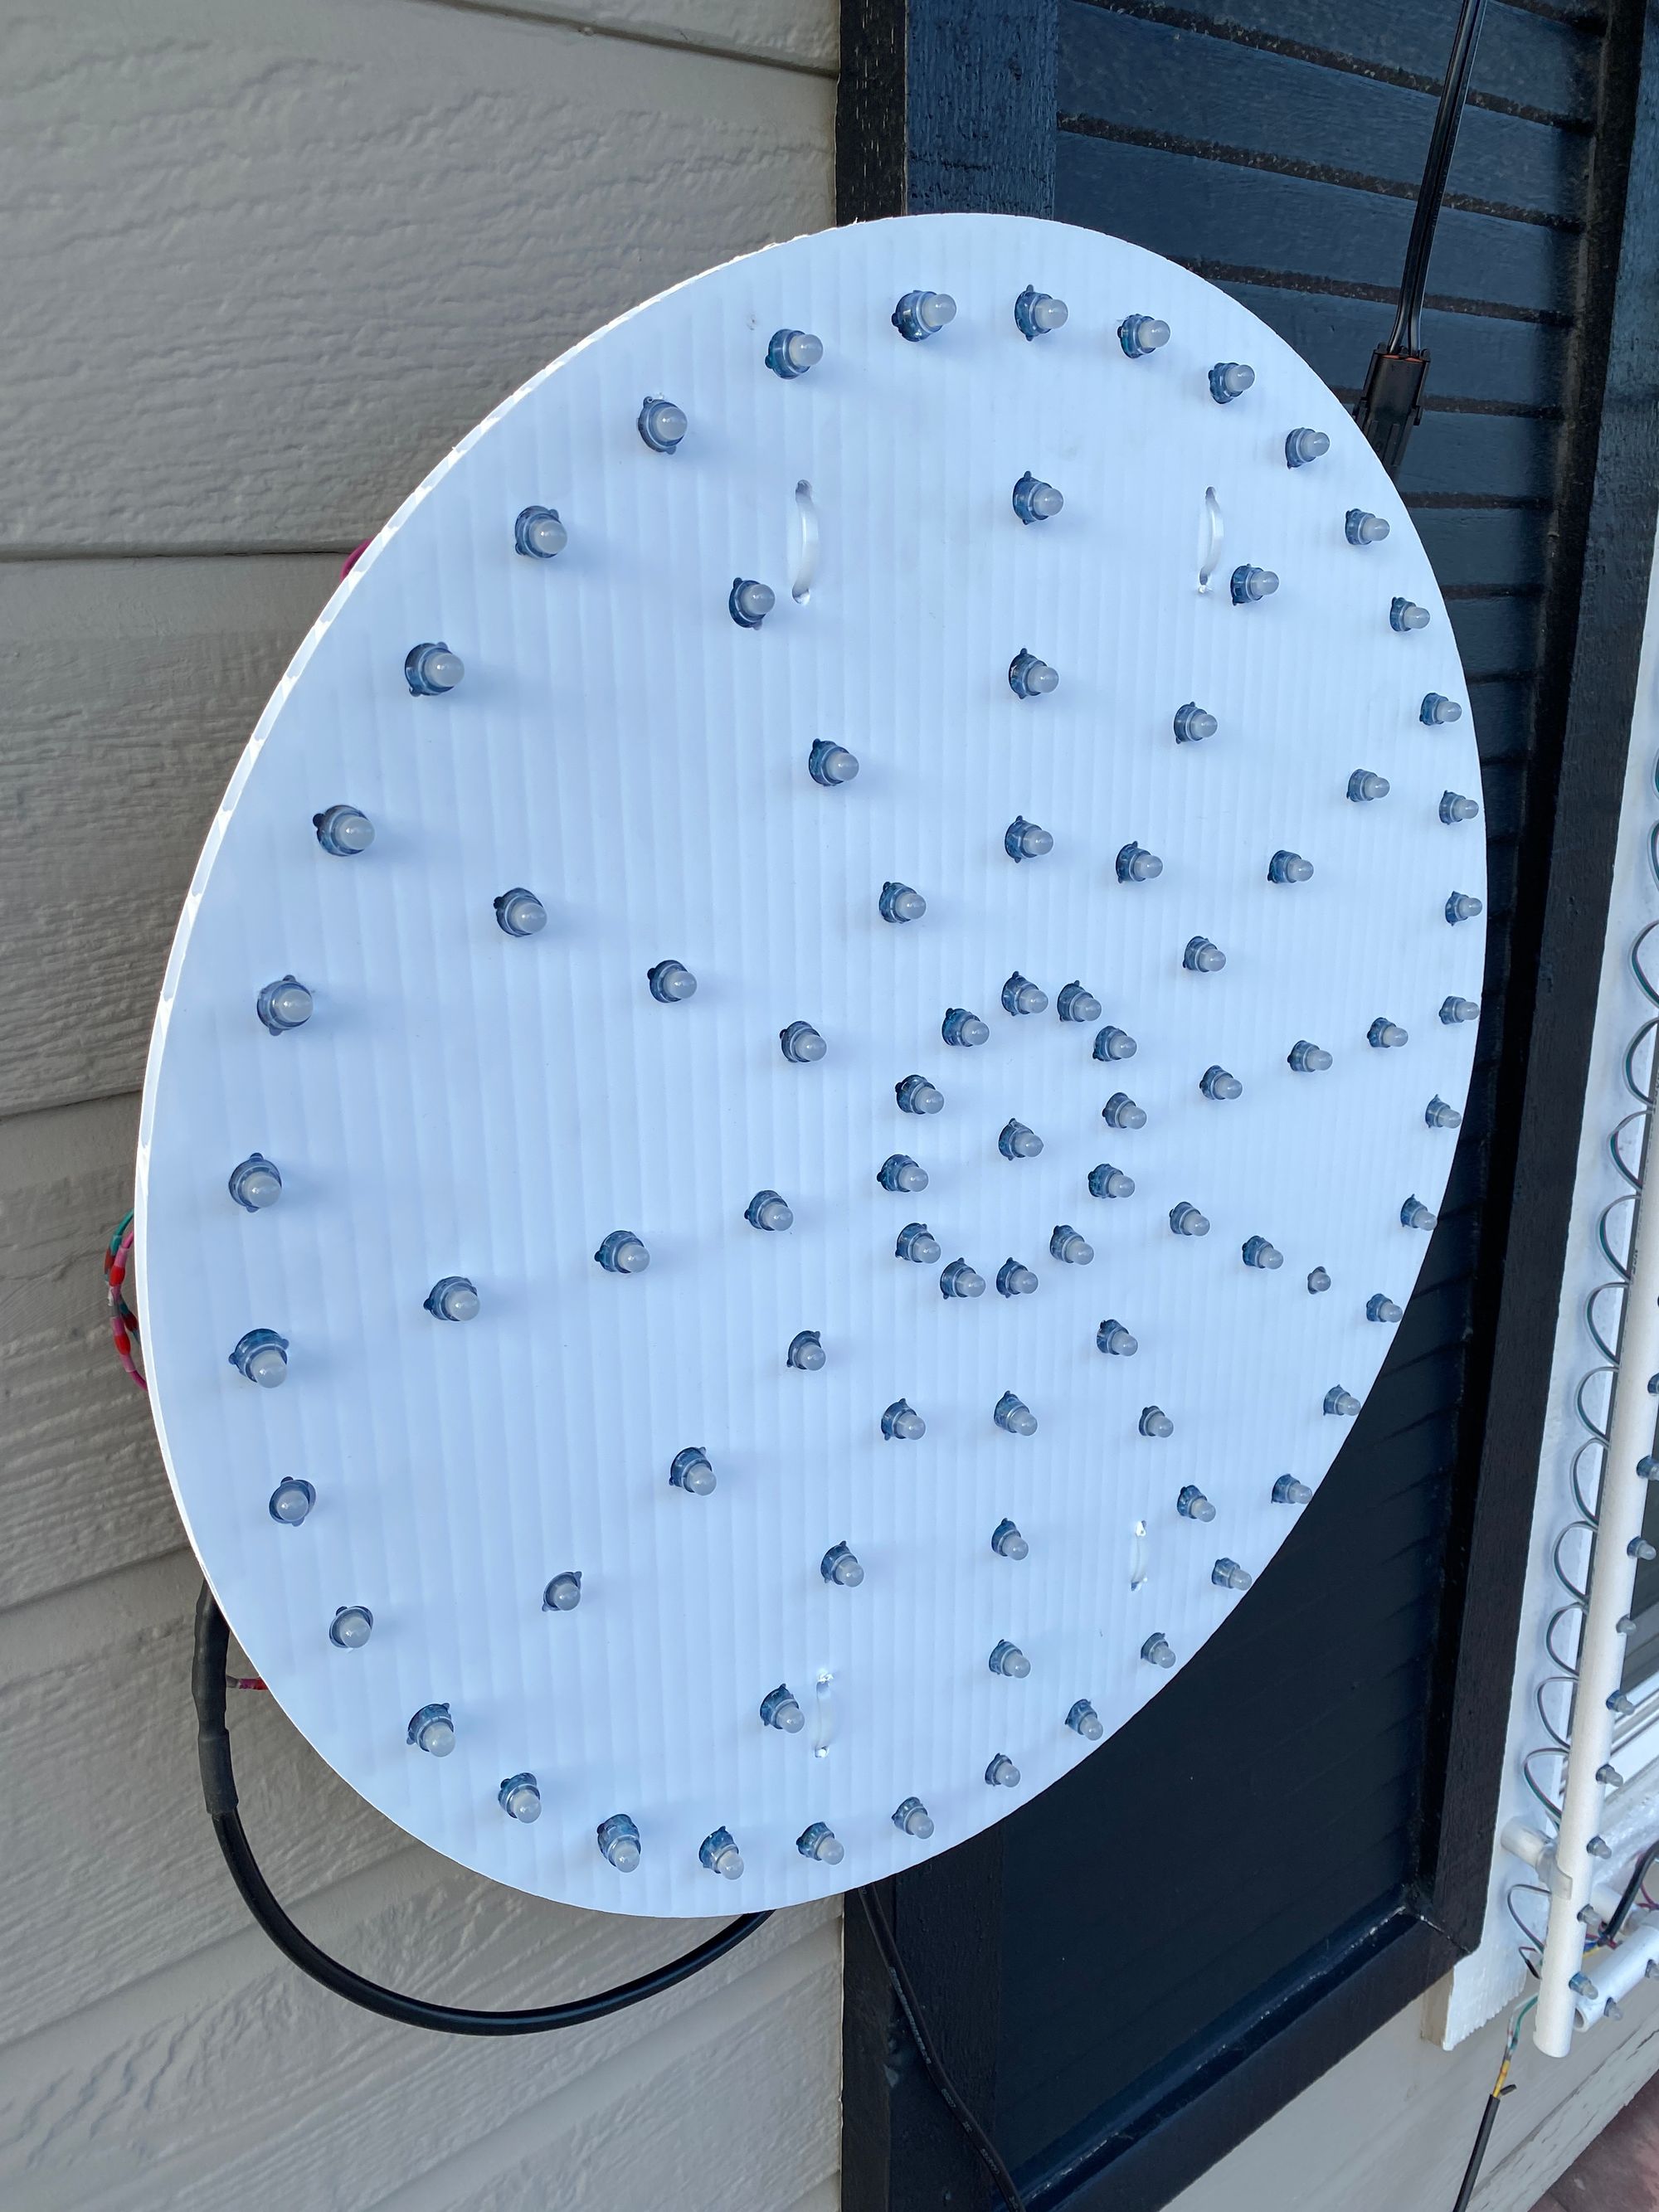
In this display, these are going to be the stars and spinners, but also applies to the arches, peace spikes, tombstones, spiders, and spider web from other displays/occasions). As a general rule, there is one plug for power for every 300 pixels in the prop, one plug for data in for every 600 pixels in the prop, and one for data out; these numbers are due to the capacity of the controllers and power distribution boards I use. Making the plugs as generic and modular as possible allows me to relocate the props without having to change the wiring based on where it may lie in a signal port's run (more on ports later or in this post).
In all cases, the data in and data out plugs only carry data and DC-; all the DC+ comes from the power plugs. I do this to ensure the highest amount of modularity for the props; since you shouldn't connect DC+ coming from two different fuses, and power ports each have their own fuse, isolating the DC+ to a single prop is the easiest way to prevent issues. This adds a small amount of complexity and, frankly, annoyance since it's possible to drive multiple small props (like the peace spike) straight from the controller without power injection; however, I decided that being consistent requires less thought while setting up the system at the cost of running a bit more cable.
As for the backing material, most of them are made from corrugated plastic (called coro) from various different vendors. When you purchase them, they come with holes for the pixels already cut into them; all you have to do is install the pixels and wire them up. The downside is that this is what most people do, so when you see displays, you can see the Holiday Coro stars, the Boscoyo spinners, etc. Personally, I don't have the patience to design my own props, so I will continue using the prefab coro blanks, but one can buy coro on their own and have it laser cut, and sometimes the companies selling these prop blanks will do custom props for people if they ask.
Lines
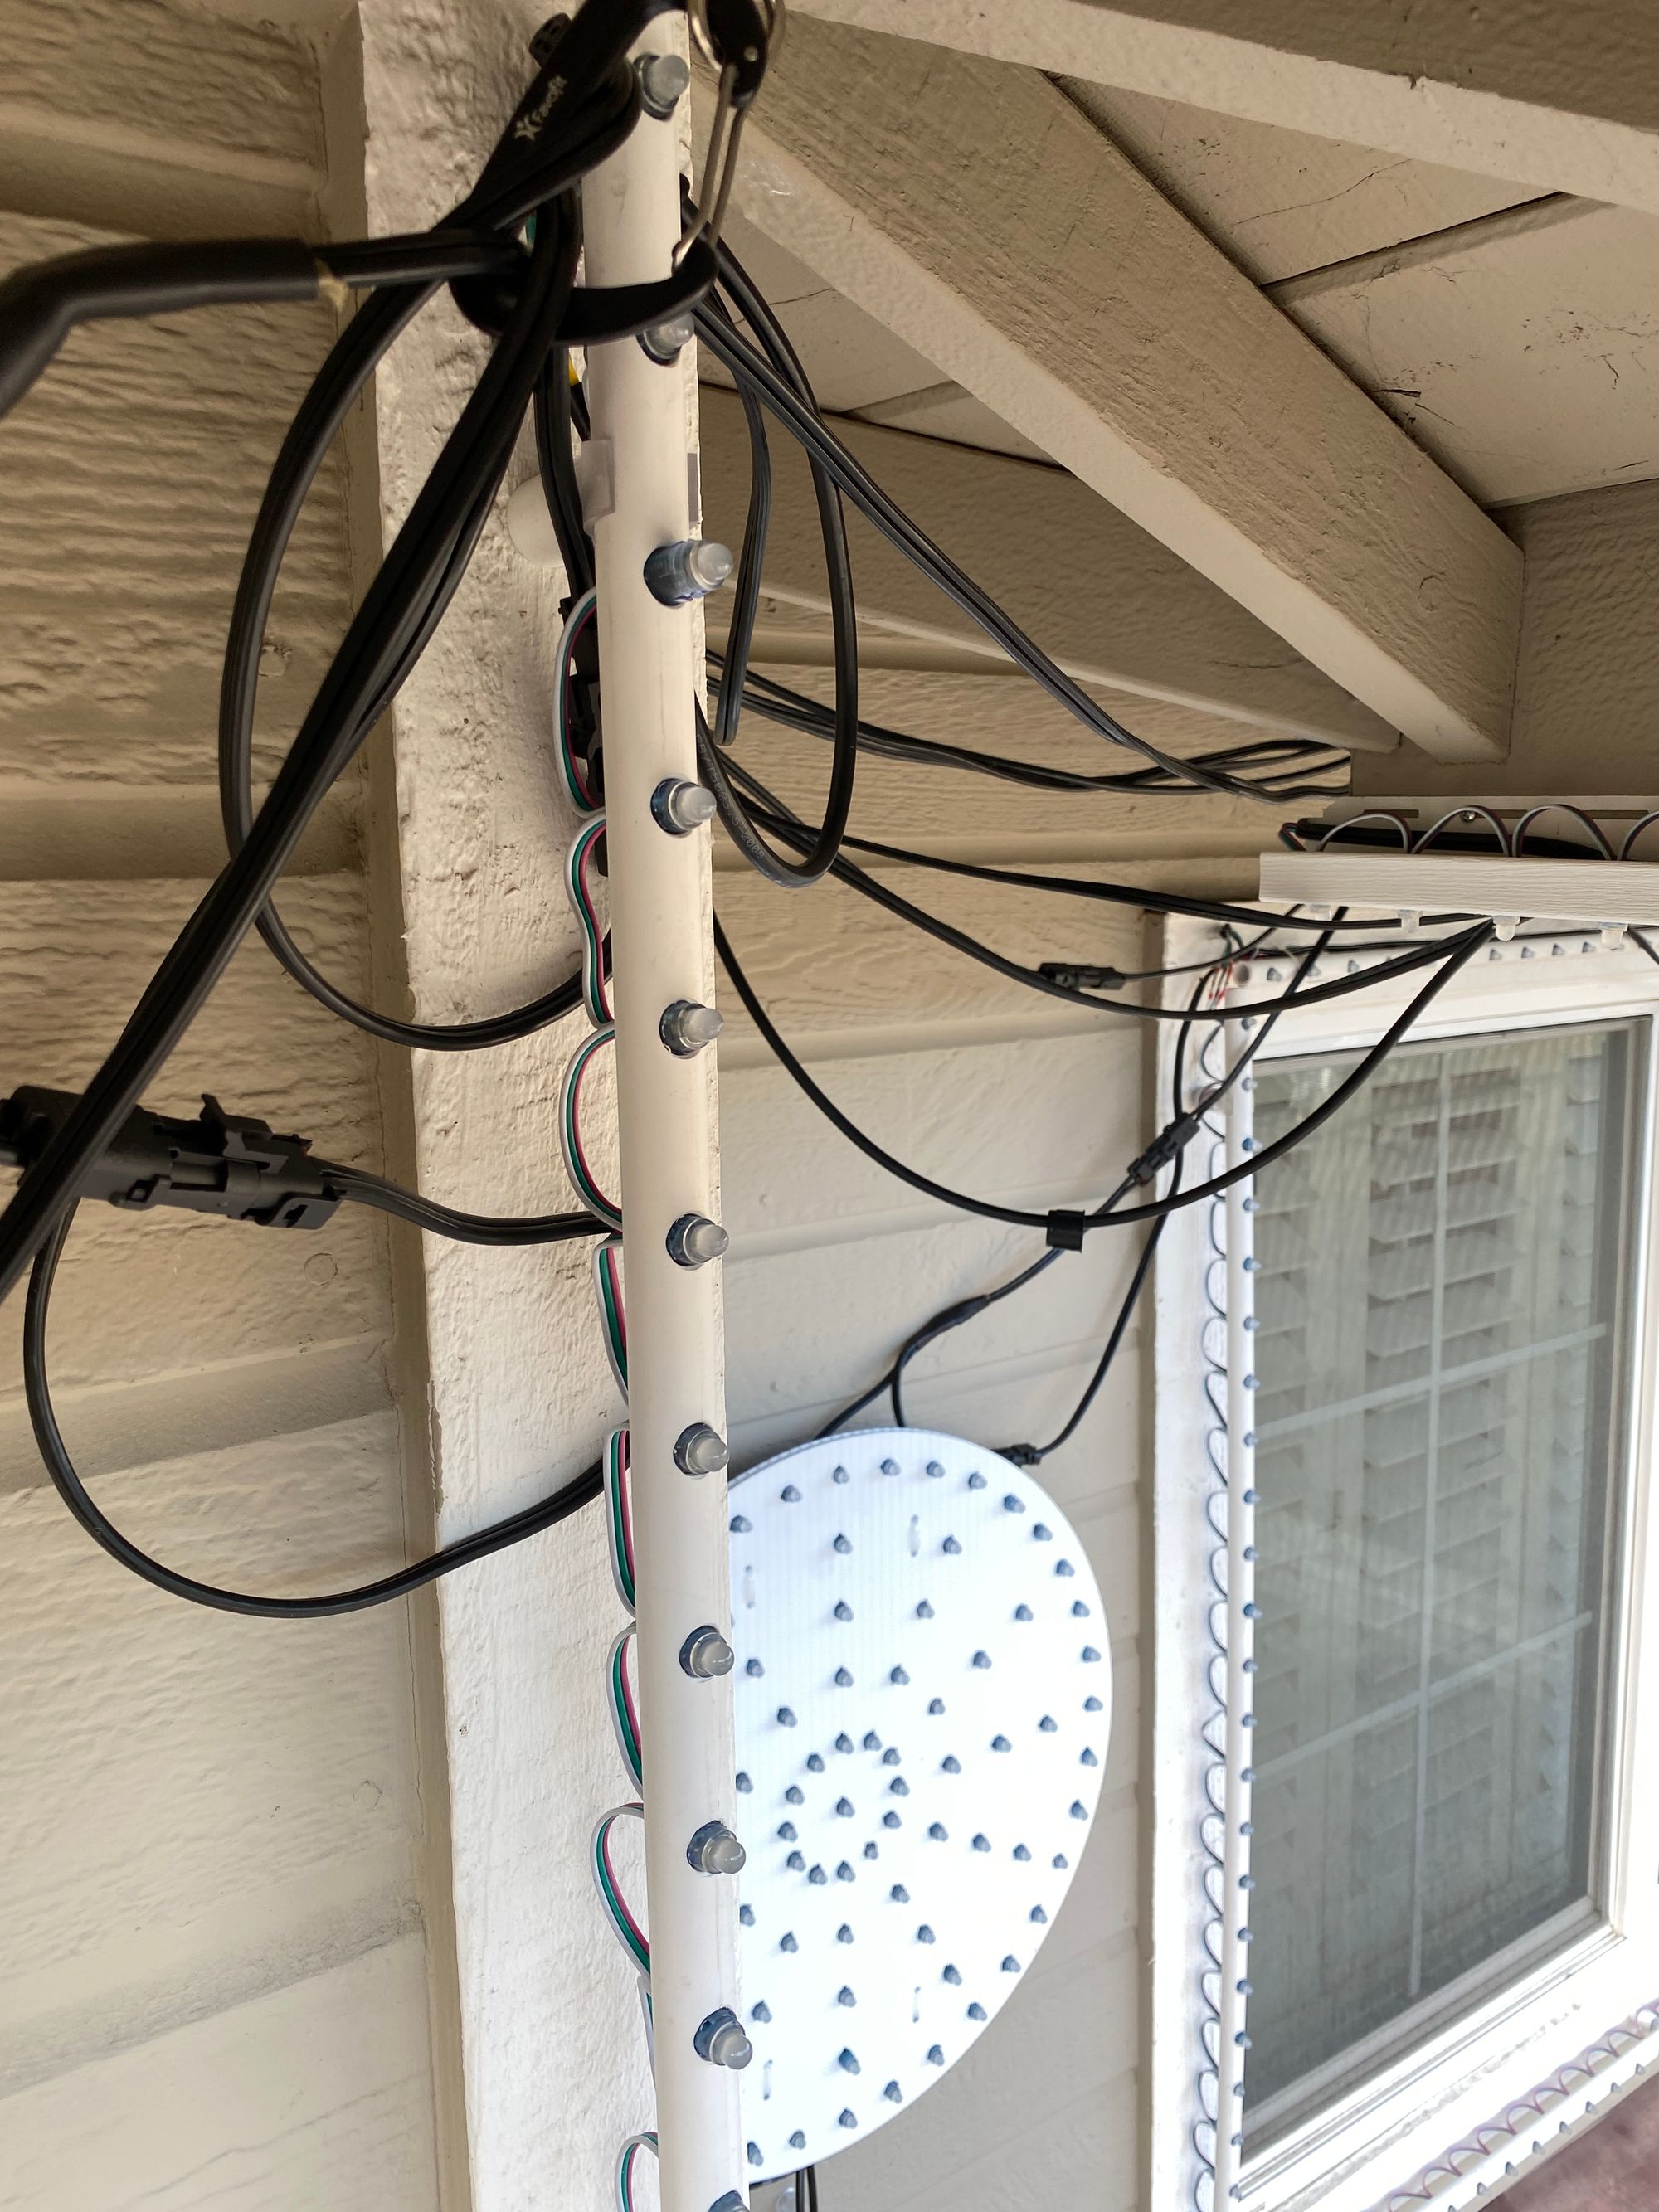
These are customized to specific parts of my house, so they are optimized more for installation and removal rather than for isolation from each other. To that end, I do power injection wherever it's convenient, share DC+ between sections when I can, and generally try to minimize the amount of cabling which has to be run.
Many of these are made from PVC, which takes a lot of time since you have to drill the holes for the pixels yourself. I drilled 1,688 holes for my display this year, so I'm very familiar with how much time this takes. However, the plus side is building props from PVC - especially for the lines around your house - is that they are very easy to install due to using PVC clips which screw into your house, they store really easily if you have the room (above my garage door is where mine will go off season) and the pixels end up looking very lined up. Further, since PVC is somewhat flexible, you can follow some curves or make curved props like arches relatively easily.
My eaves are built using vinyl J-channel and installed in such a way that they will be up year round. I wrote this post on the subject a while ago
Cabling
I use two completely different types of cable in my display: signal and power. The cables themselves are considerably different, the ends are completely incompatible, there is generally no confusing the two. This makes it very easy to determine where the power is going and where the signal is going at a glance, and completely eliminates the possibility to connect a power cable to a data plug or vice versa.
Data
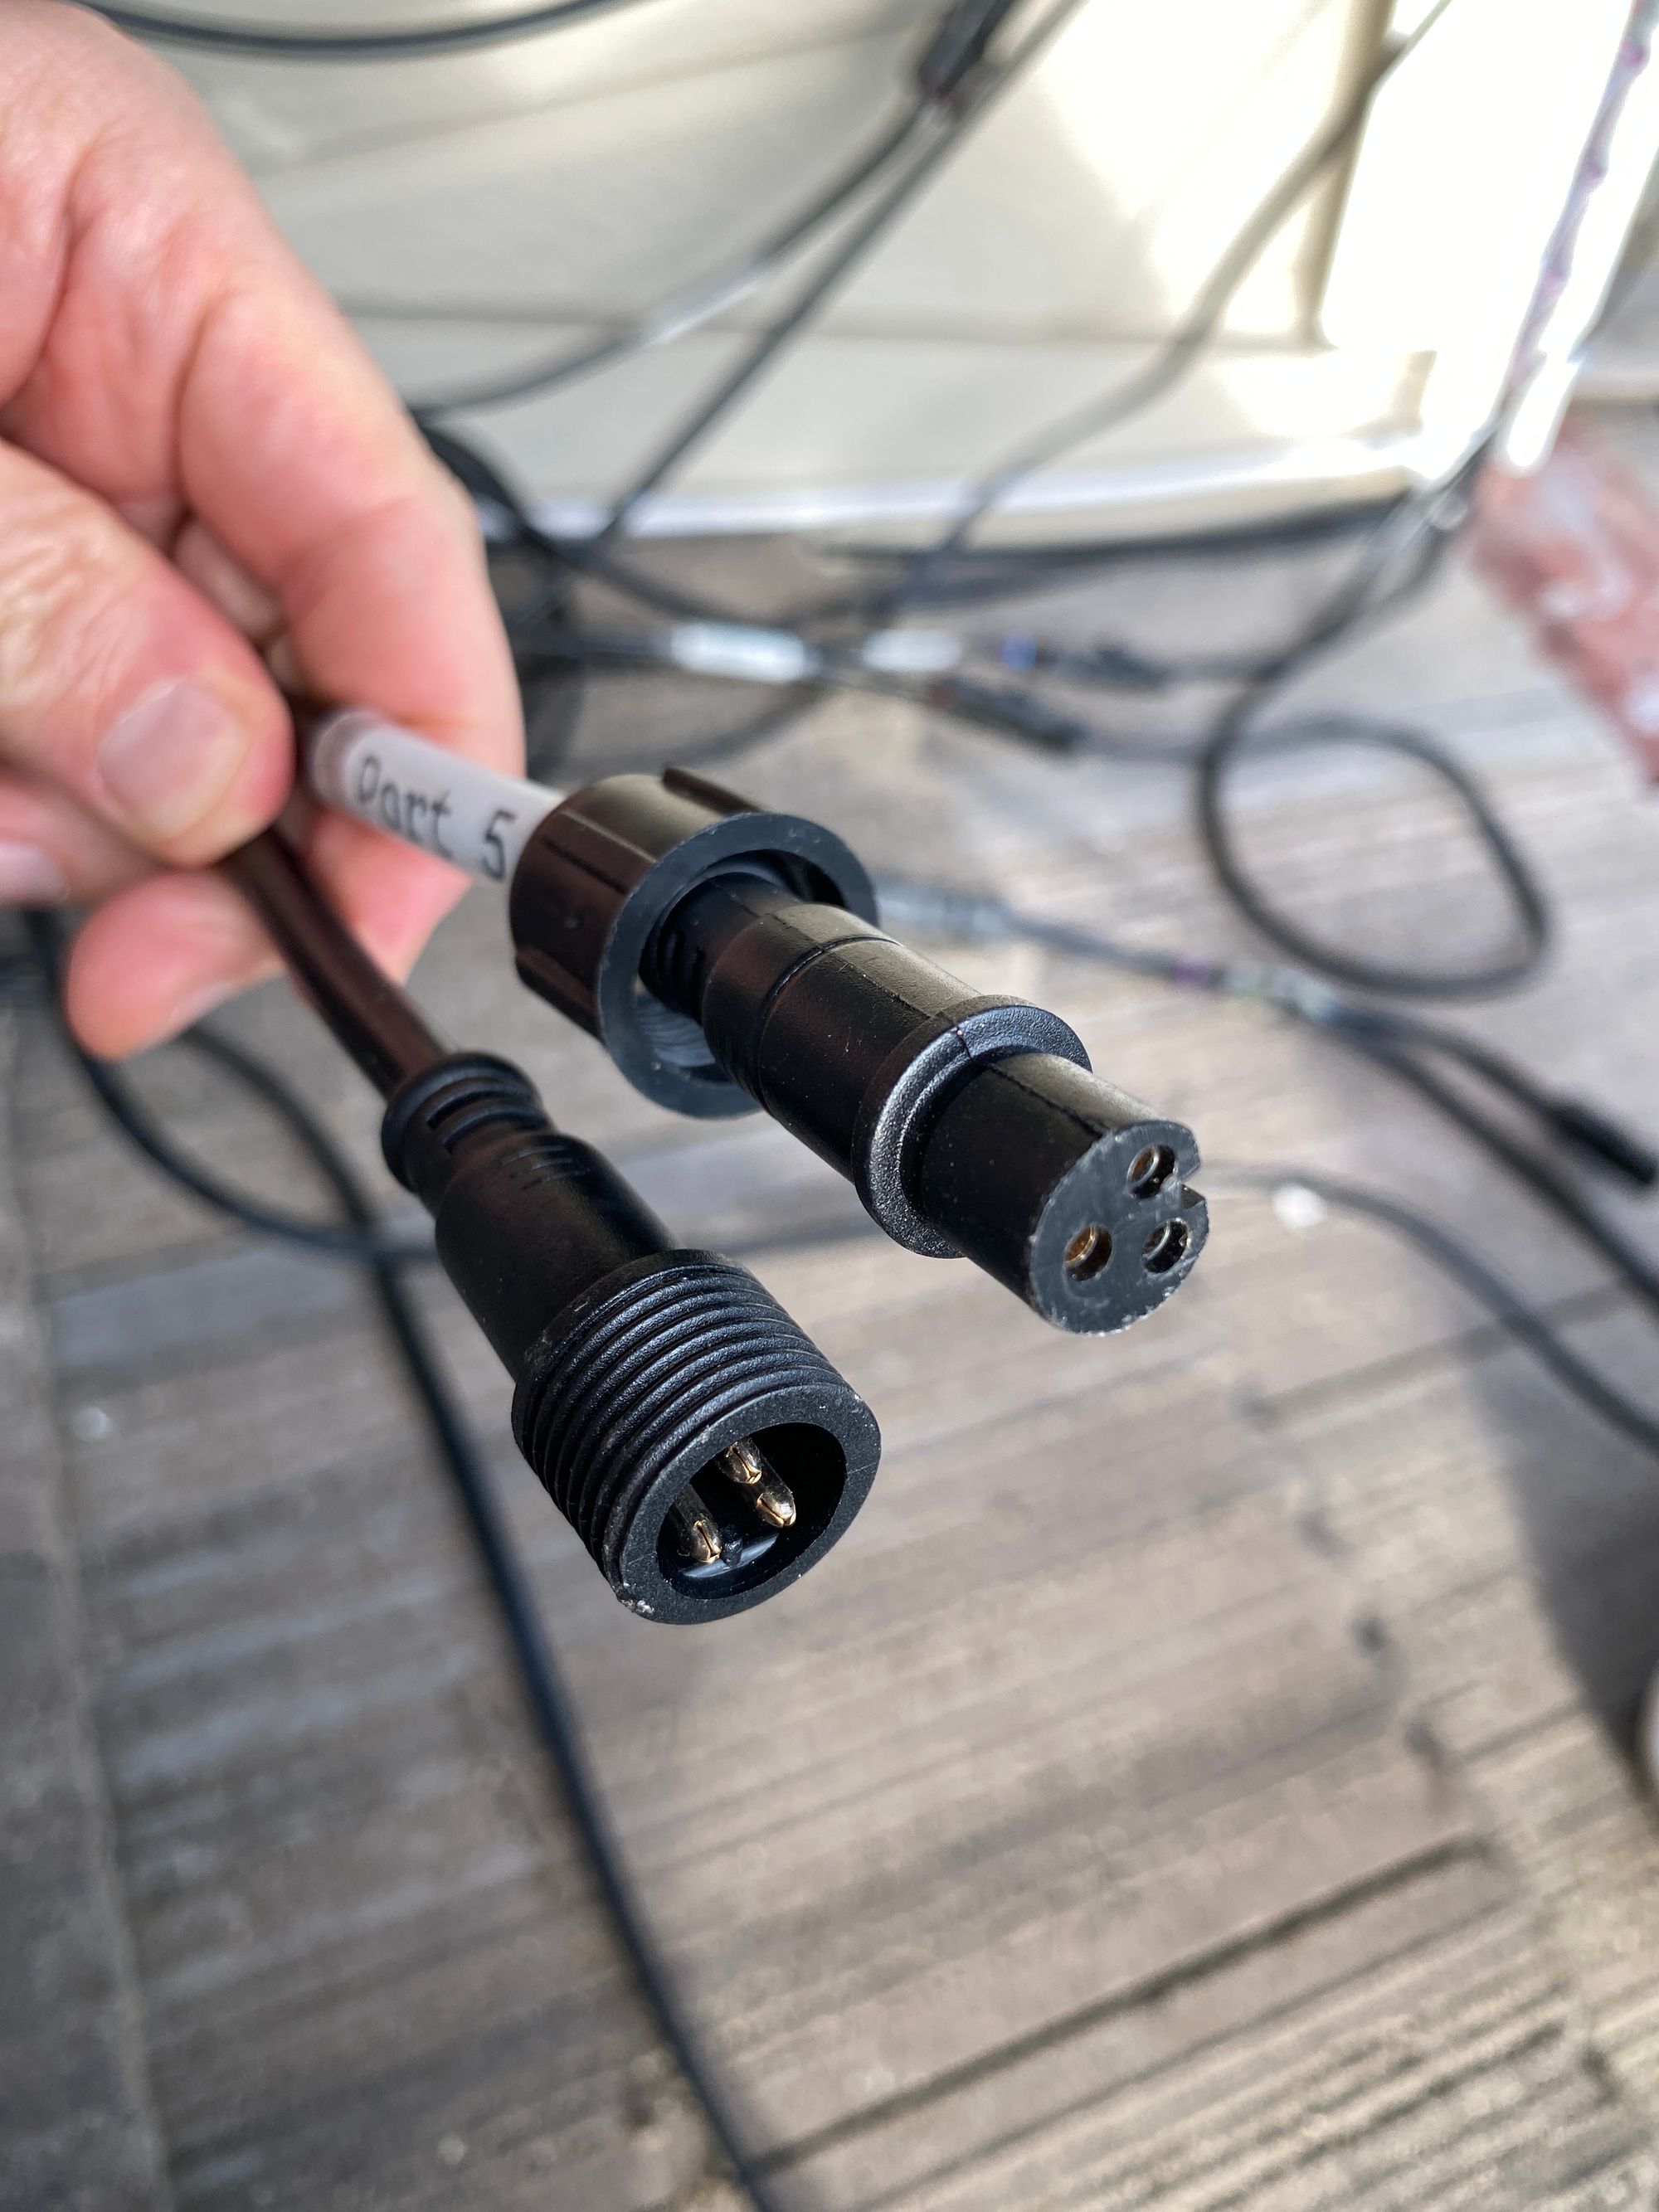
The data cables I use are all assembled by the manufacturer and is ready to go when I receive it. I generally receive 4' lengths and 10' lengths which I combine as needed to run from controllers to props or between props. For longer runs (more than two 10' lengths), I'll install a signal booster between the last part of the long run and the prop. However, since the booster requires DC+ and, as mentioned before, I don't pass DC+ out of props, the signal booster will only work between the controller and the first prop; therefore, I have to make sure I don't do runs longer than ~20' between props because I can't boost the signal and it could deteriorate across runs longer than this. Personally, I'm using the xConnect brand of cable ends for pigtails on the props or on the prefab cables I buy; nothing wrong with other connector types, these are just the ones I purchased first and there's no reason to change.
Power
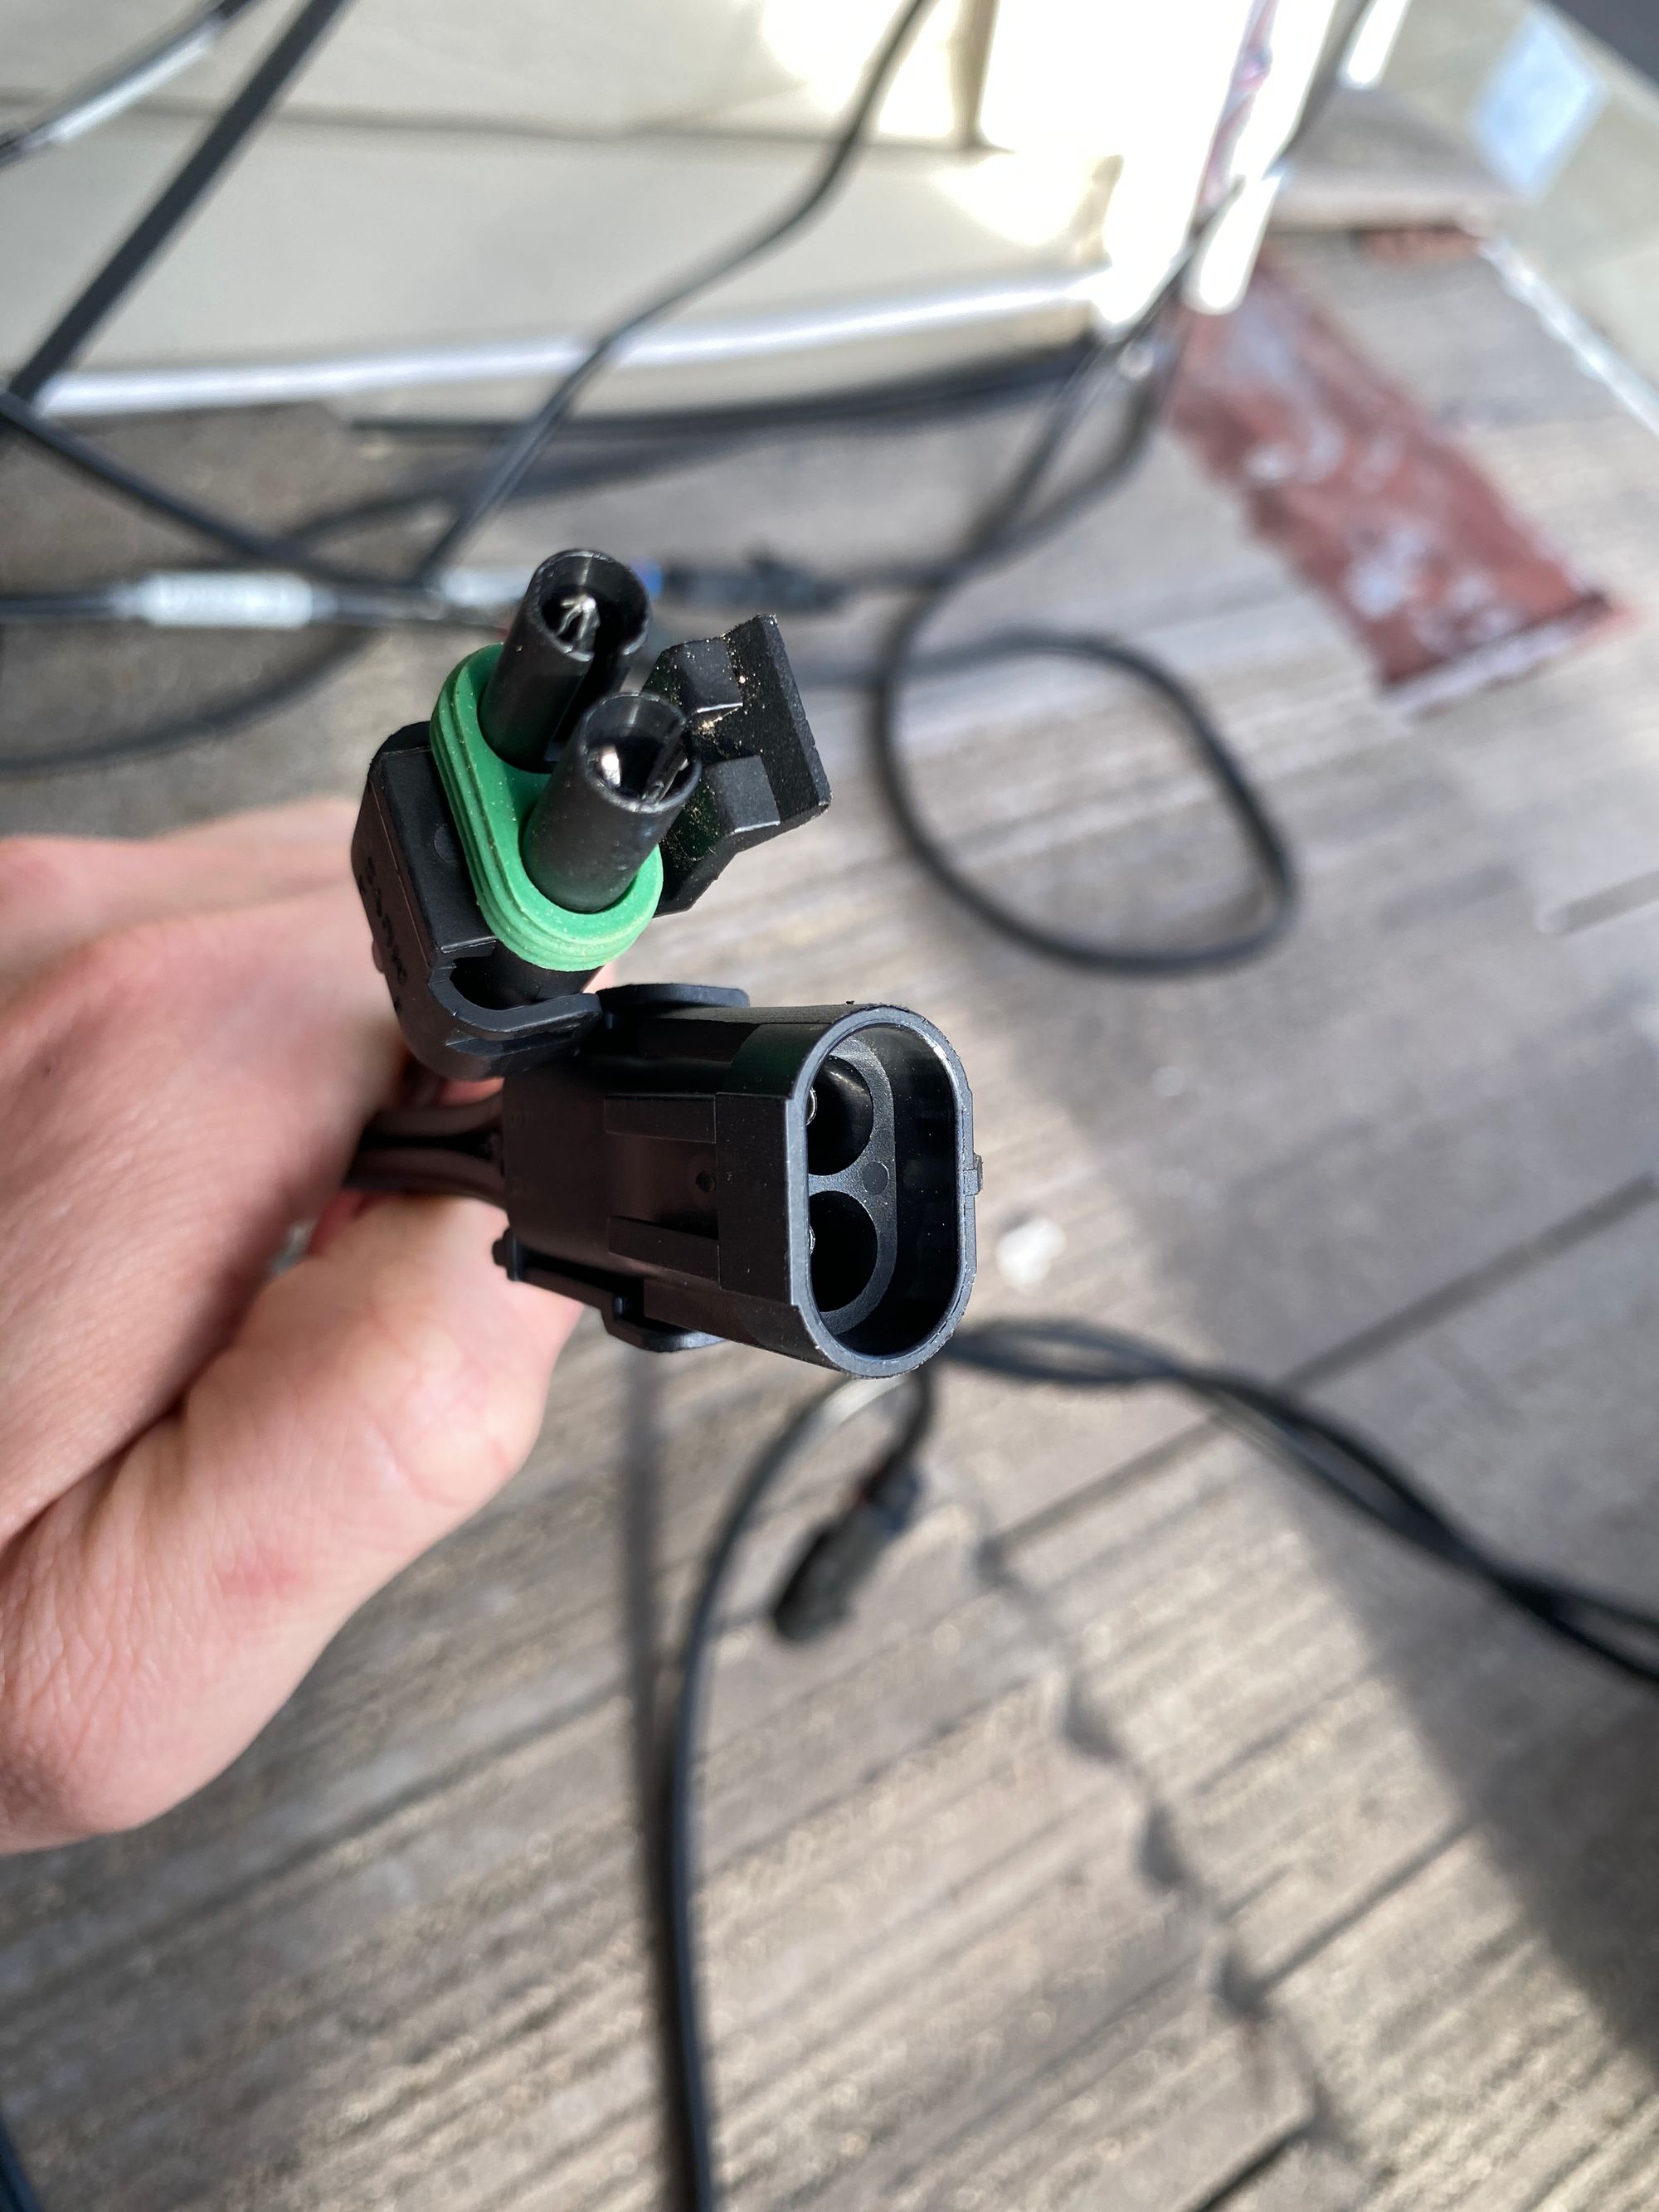
The power cables I custom build from bulk 12ga or 14ga two-conductor wire and Muyi connectors. I built a bunch of 4' and 10' lengths to match the data cables I have, but power injection is different. Whereas data cables are a single line and each input has one output, power can branch off multiple times with no problems (technically this is what happens at each pixel too); therefore I have had to create a ton of tee junctions. These junctions have one input and two outputs so I can have a line which branches at each of several props, one tee at each prop. I've built a bunch of standalone tees for generic use, but also have built some whole cable assemblies with multiple soldered tees for specifically placed props. I built all of those at my old house (believe it or not, it was faster to build these assemblies than the individual tees) so the spacing no longer makes sense for my current display.
I mentioned earlier I built a bunch of 4' or 10' lengths, but I also have several much longer cables (30' or more) using 12ga for less voltage drop. These are handy because you can have half as many pixels on a power port as on a data port, so you end up running twice as much power cable and it's easier to build one long cable which reaches way over there than several shorter modular cables. A good mix of each is a good idea too.
Pixels
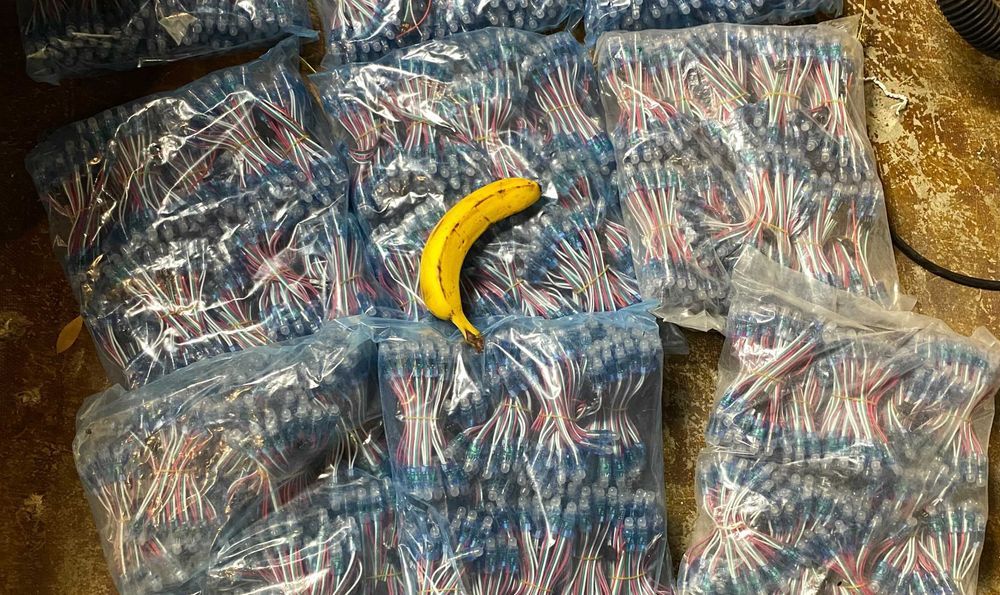
I use exclusively 5V RGB pixels, though I may use 12V if I build some really high density props since 12V requires less power injection. Generally, I build props with the pixels and leave them in until I decide to completely scrap the prop, so even though I have fewer pixels this year, I purchased about 1000 more pixels for building props this year. I've bought from Ali Express and the Alitove brand from Amazon and there doesn't seem to be a major difference in quality. On the other hand, there is a difference in color, both of the wire and of the pixels themselves, so if you buy from multiple sources, you should be careful about mixing and matching.
For building props and getting the pigtail ends onto the props, I use solder seal connectors. I cannot sing their praises enough. They're easy to install and provide a reasonably durable connection, doing both weather sealing and soldering of the wires together. I probably shouldn't, but I regularly shove a 14ga and 22ga wire into each end of the blue connectors and they seem to hold up well.
Power
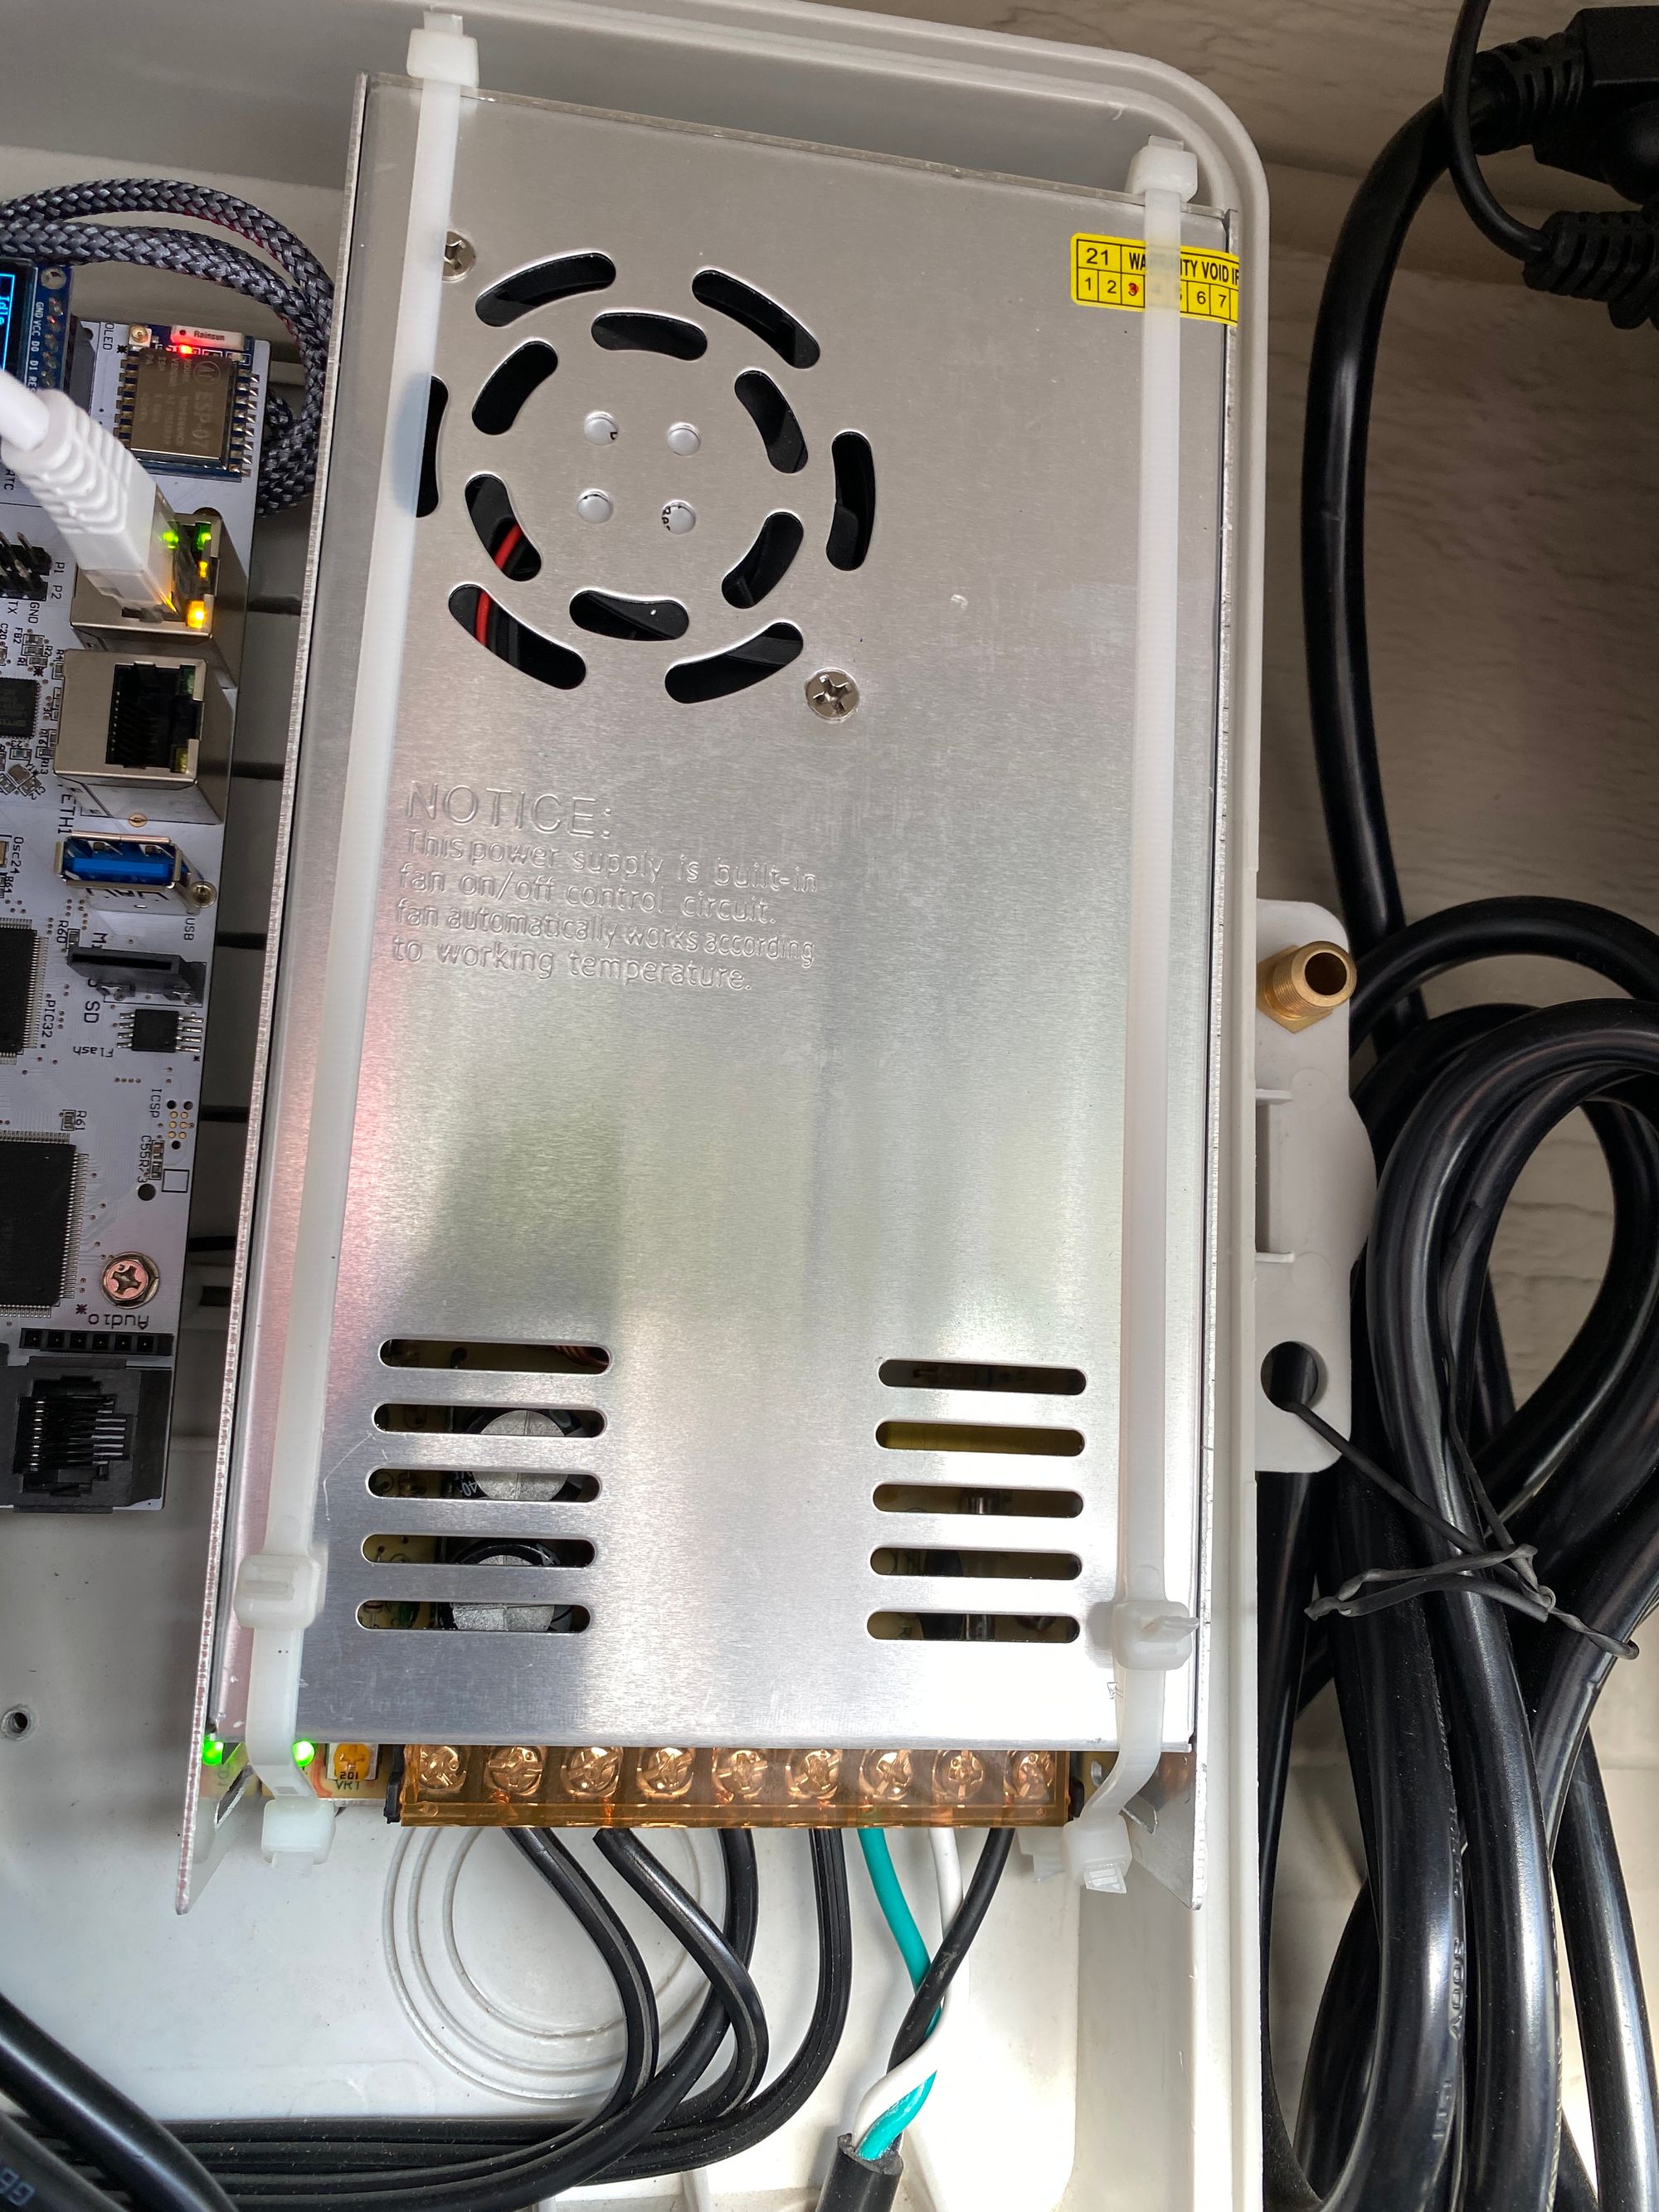
Virtually all of my show runs on two Mean Well 300W 5V power supplies, both the power to the pixels and the controllers themselves. There are many manufacturers of these and I'm sure they're fine, but Mean Well is a known high-quality brand, so I tend to go with those. The only things which don't use the 5V output from the power supply are the Falcon Player and the FM transmitter; those are both plugged into the wall. I have the Pi and the rest of the show on two different outlets of a dual smart plug so I can leave the Pi on while turning the pixels and controllers off during the day (the pixels conflict with the garage door opener radio, so I want them to be off as much as possible).
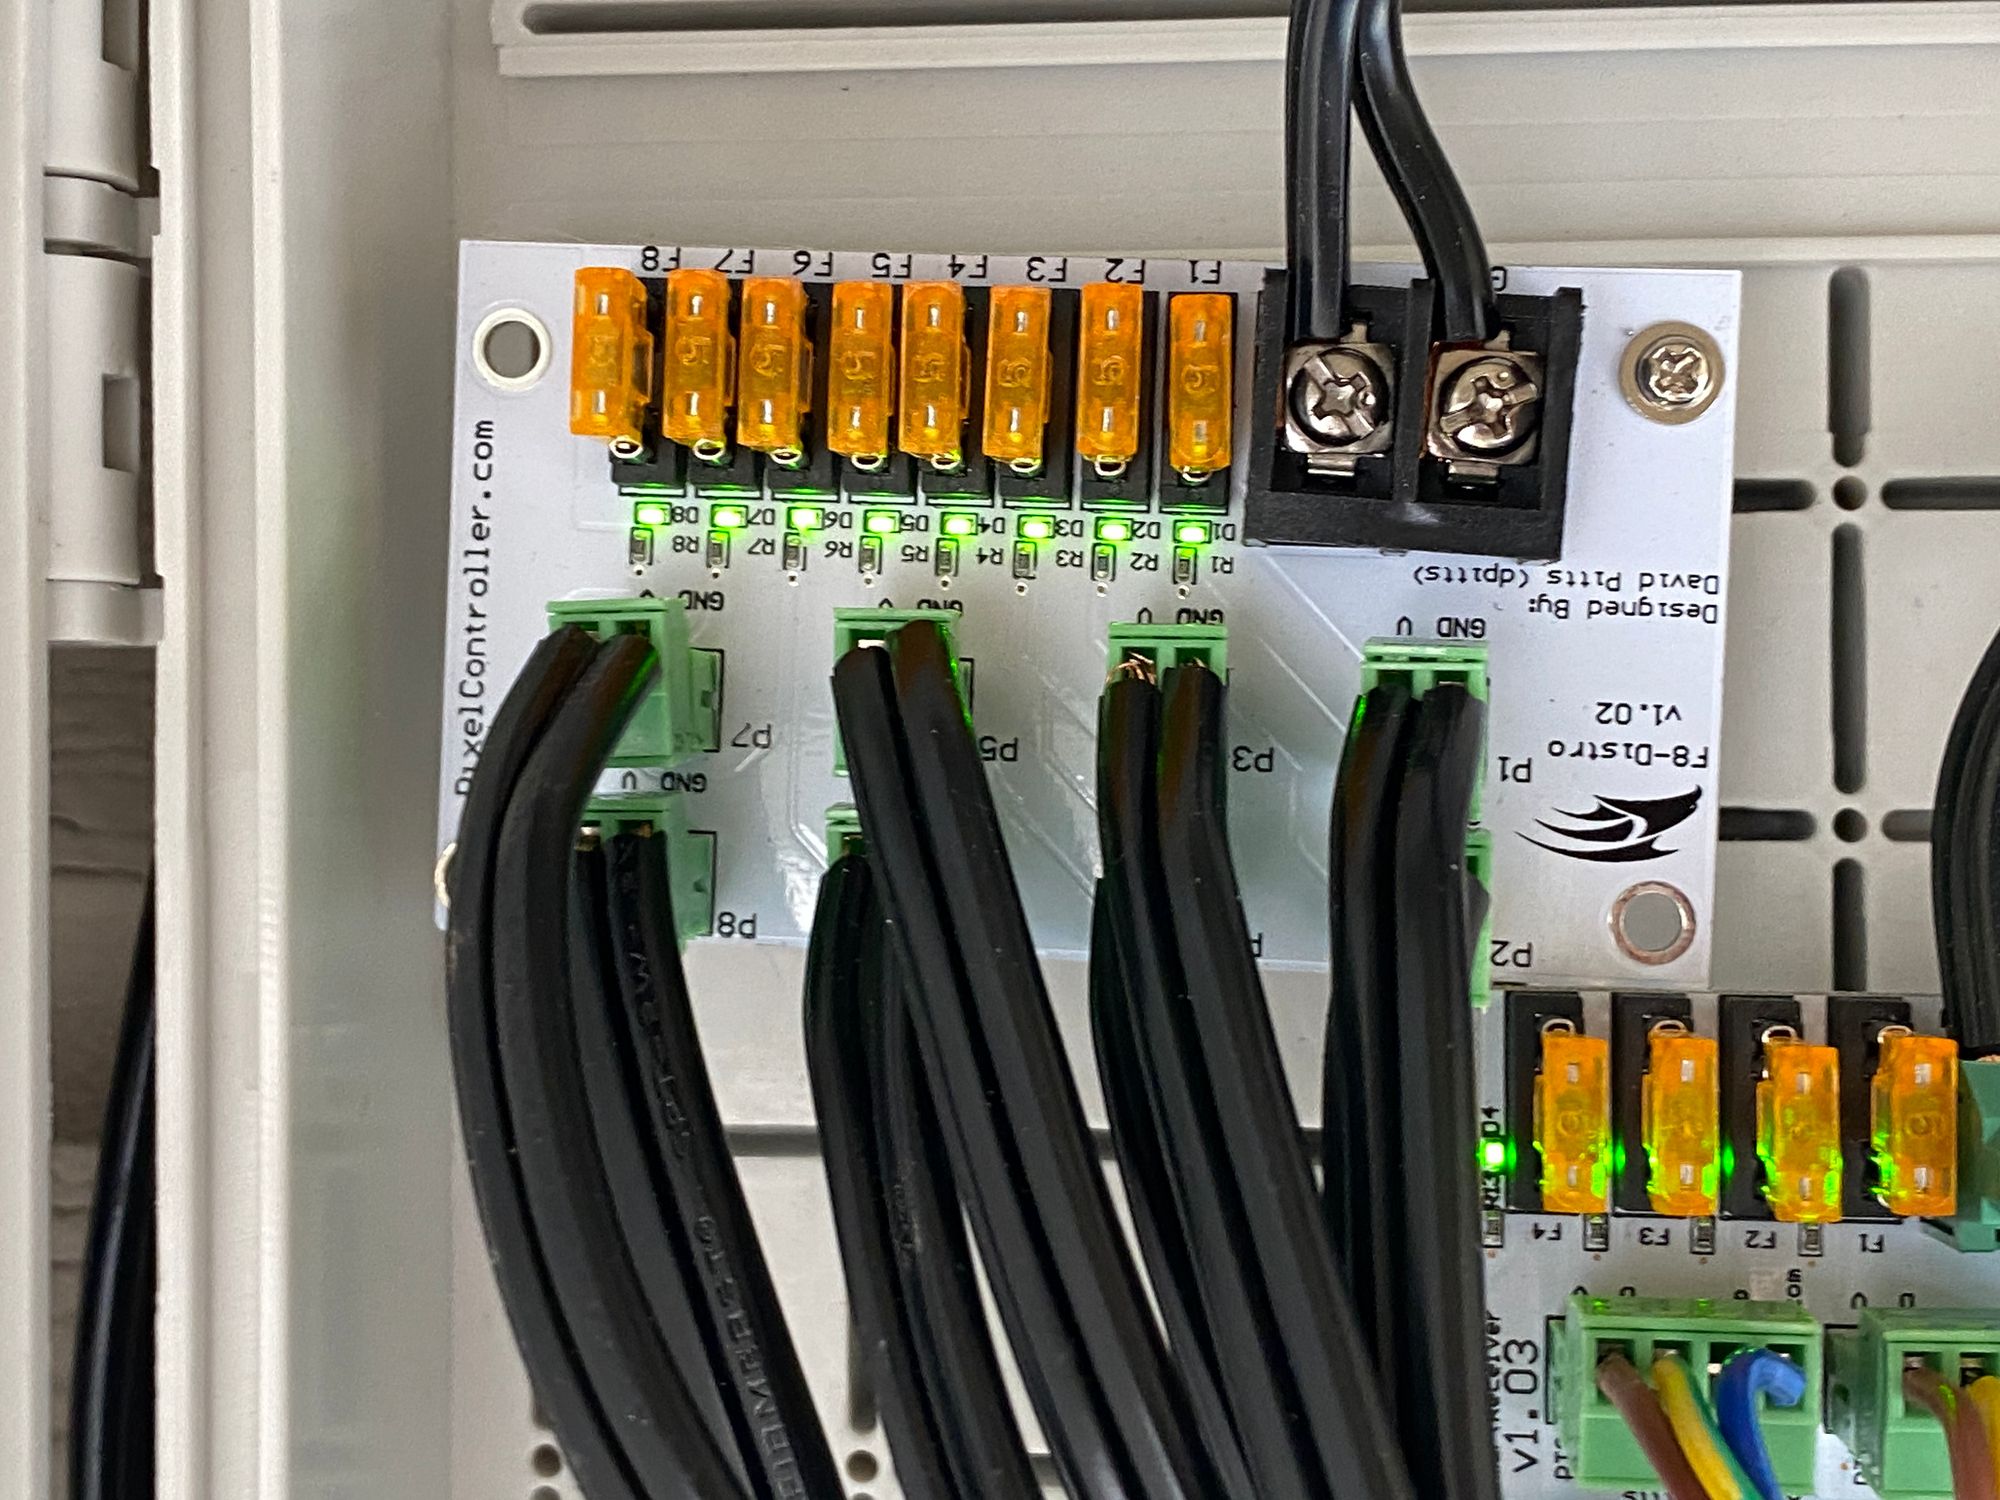
There are two Falcon F8 Distro power distribution boards, one per power supply, which take in 5V (or 12V) and spread it across 8 5A fused ports, each of which is capable of driving about 300 pixels (50mA per pixel * 0.3 brightness coefficient * 300 = 4.5A if all pixels are at full white, which they virtually never are); these are what do the power injection to the lights.
Control
There are three major components to the control system: the Falcon Player, the pixel controller, and the smart receivers.
Falcon Player

This is the main driver and coordinator for the show. Falcon Player is an operating system and piece of software which is capable of controlling multiple pixel controllers, as well as coordinating with other Players to synchronize larger displays. While it can be used on many different single-board computers, I'm using a Raspberry Pi 4b with 4Gb of RAM. Its responsibility in my show is to do the scheduling (which playlist should play at what time), content management (songs, sequences, playlists), and playing the song in time to the sequence via the audio out. I can use its web interface to control the playlists and playback and to configure the controllers it communicates with. In my case, it's a single controller, the Falcon F4V3.
Controller
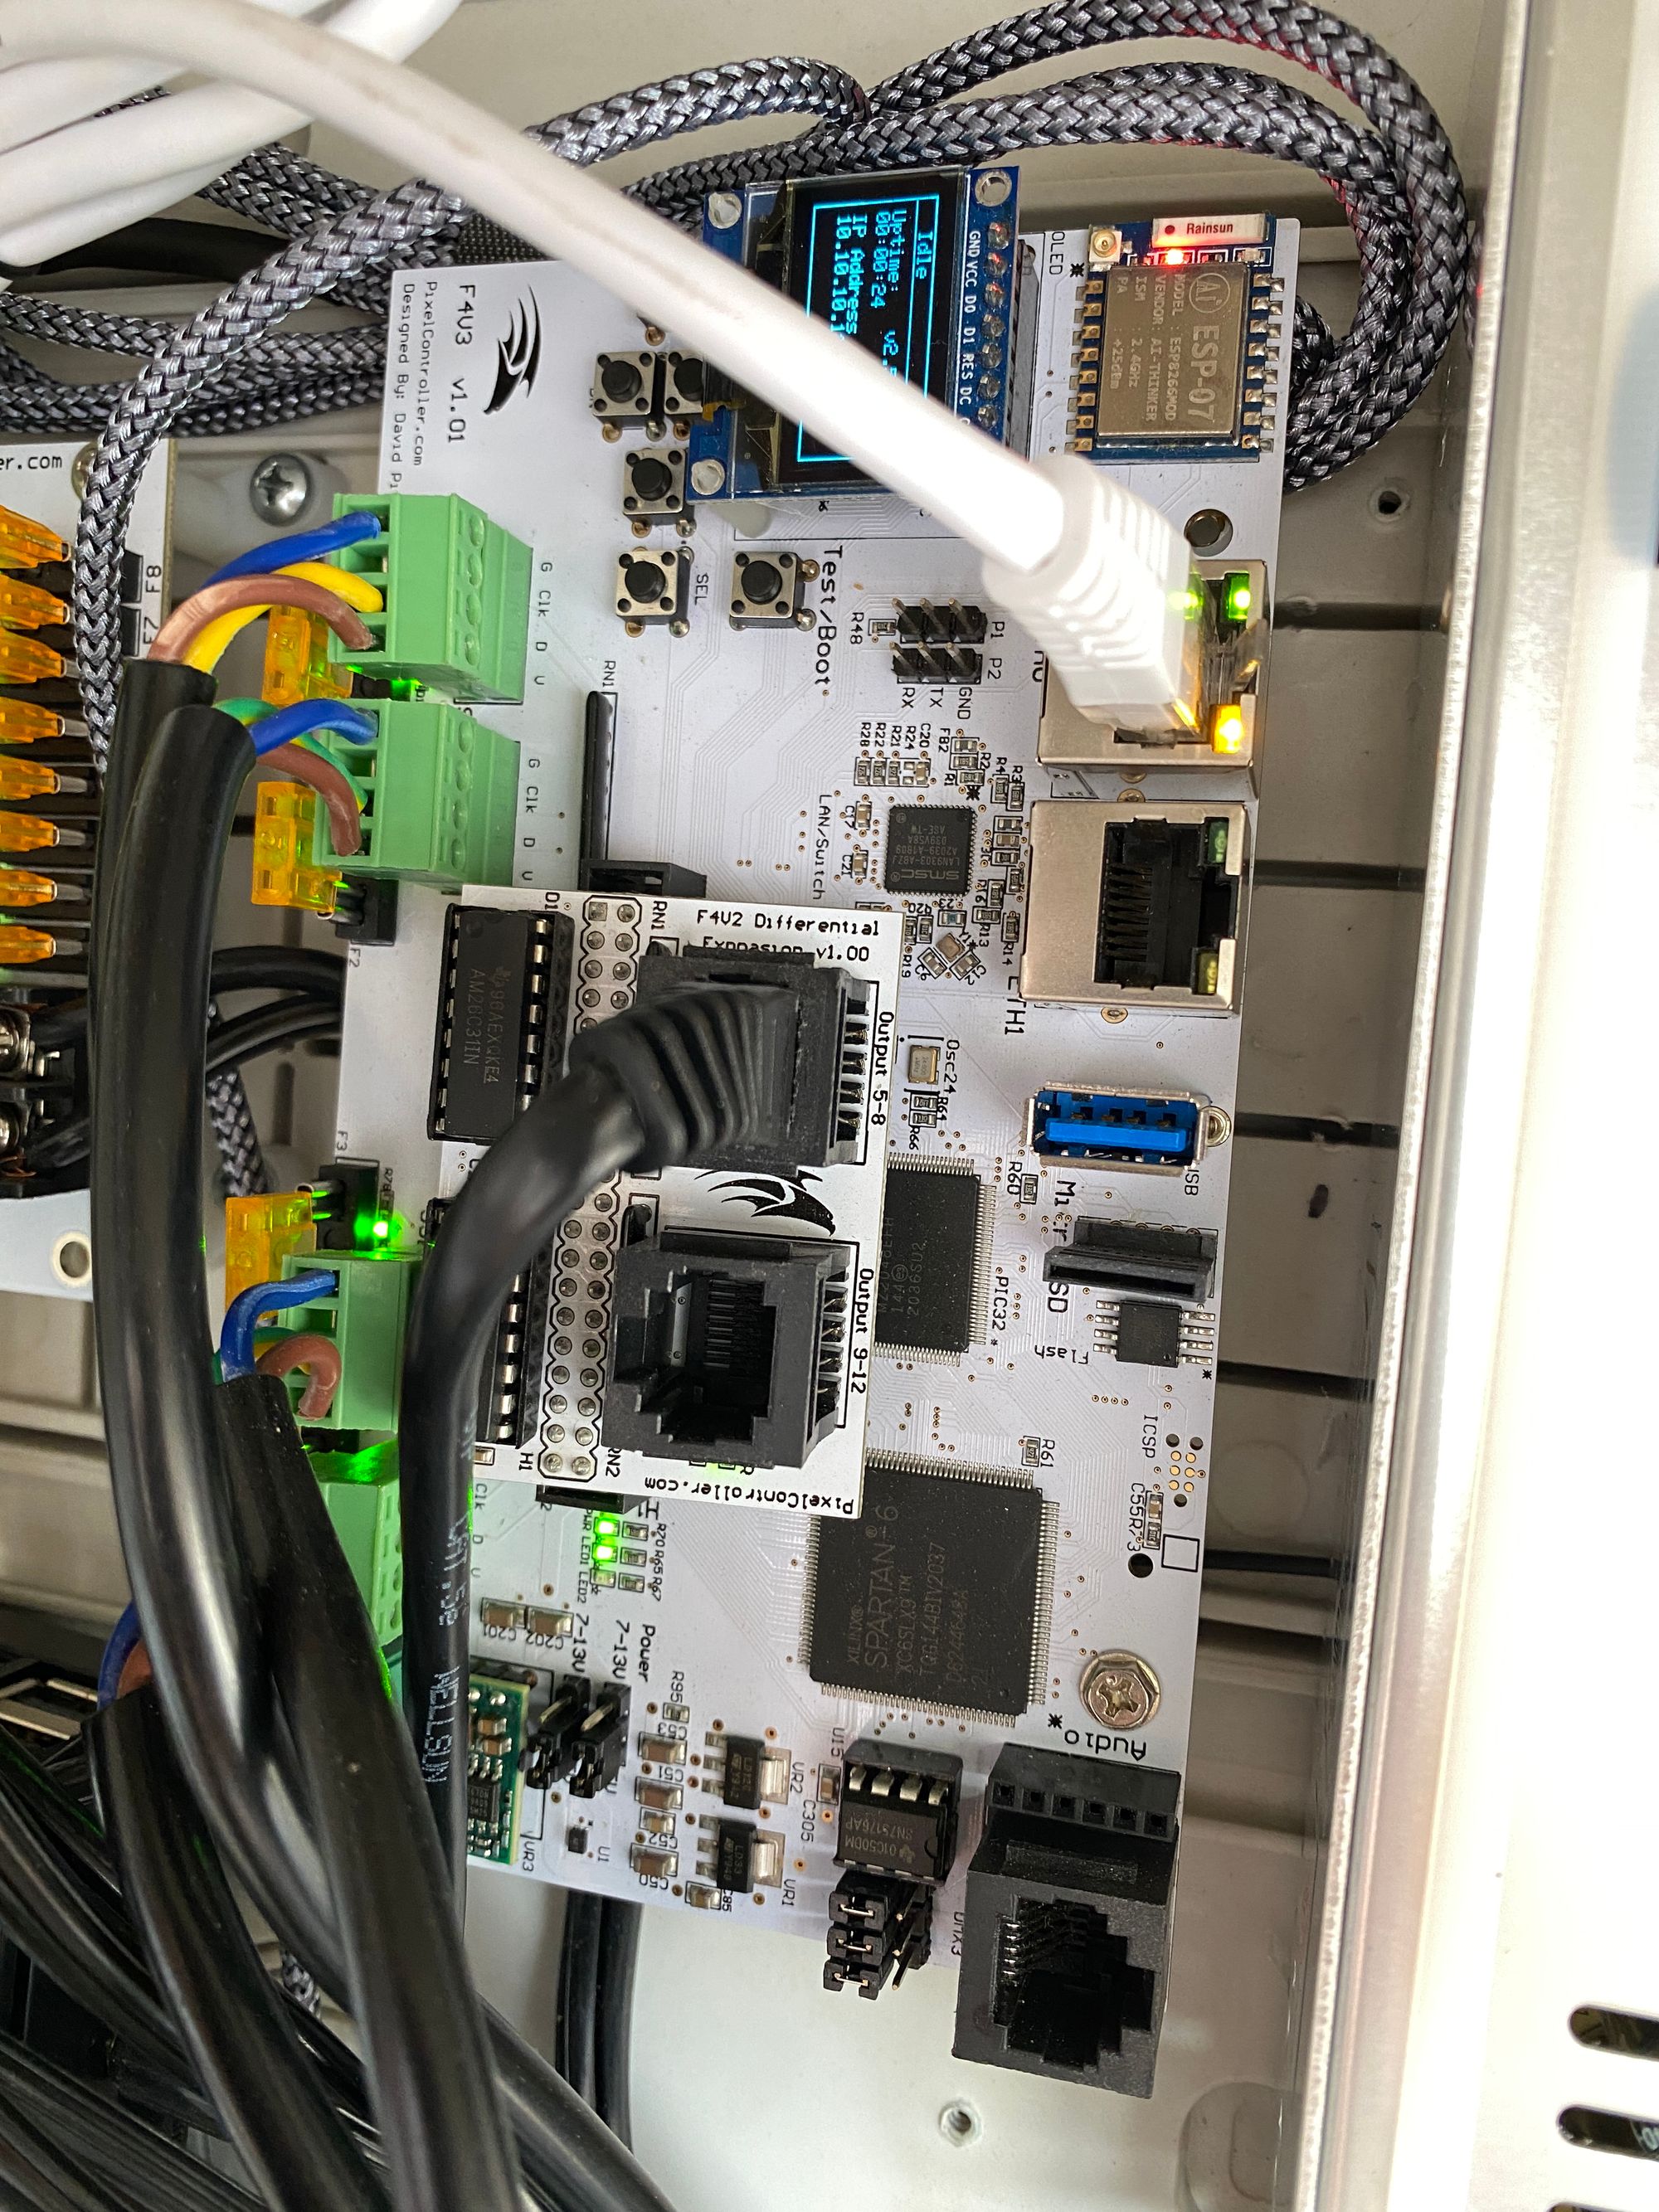
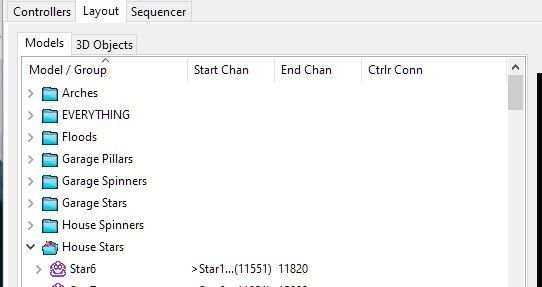
As was just mentioned, I'm using a Falcon F4V3 for my show. Its responsibility in my show is to receive the sequence data coming from the Falcon Player and split it into signals that are sent out over each data port. It natively supports 4 ports, but I also have the expansion card which extends it to 12 ports using smart receivers which are connected to the F4V3 via ethernet cables. Each port can send data to up to 680 pixels running at 40fps, or up to 1024 pixels at 20fps; I generally try to keep it to 600 or fewer pixels per port since that means each data port on the controller (and smart receiver) gets two power ports from the power distribution board for a 1:1 controller-to-distribution-board ratio. The main controller is where I configure how many pixels are on each port and, optionally, configure each individual prop on each port for testing purposes; this would allow me to, say, reduce the brightness for high-density props separately to the rest of the show.
Smart Receiver
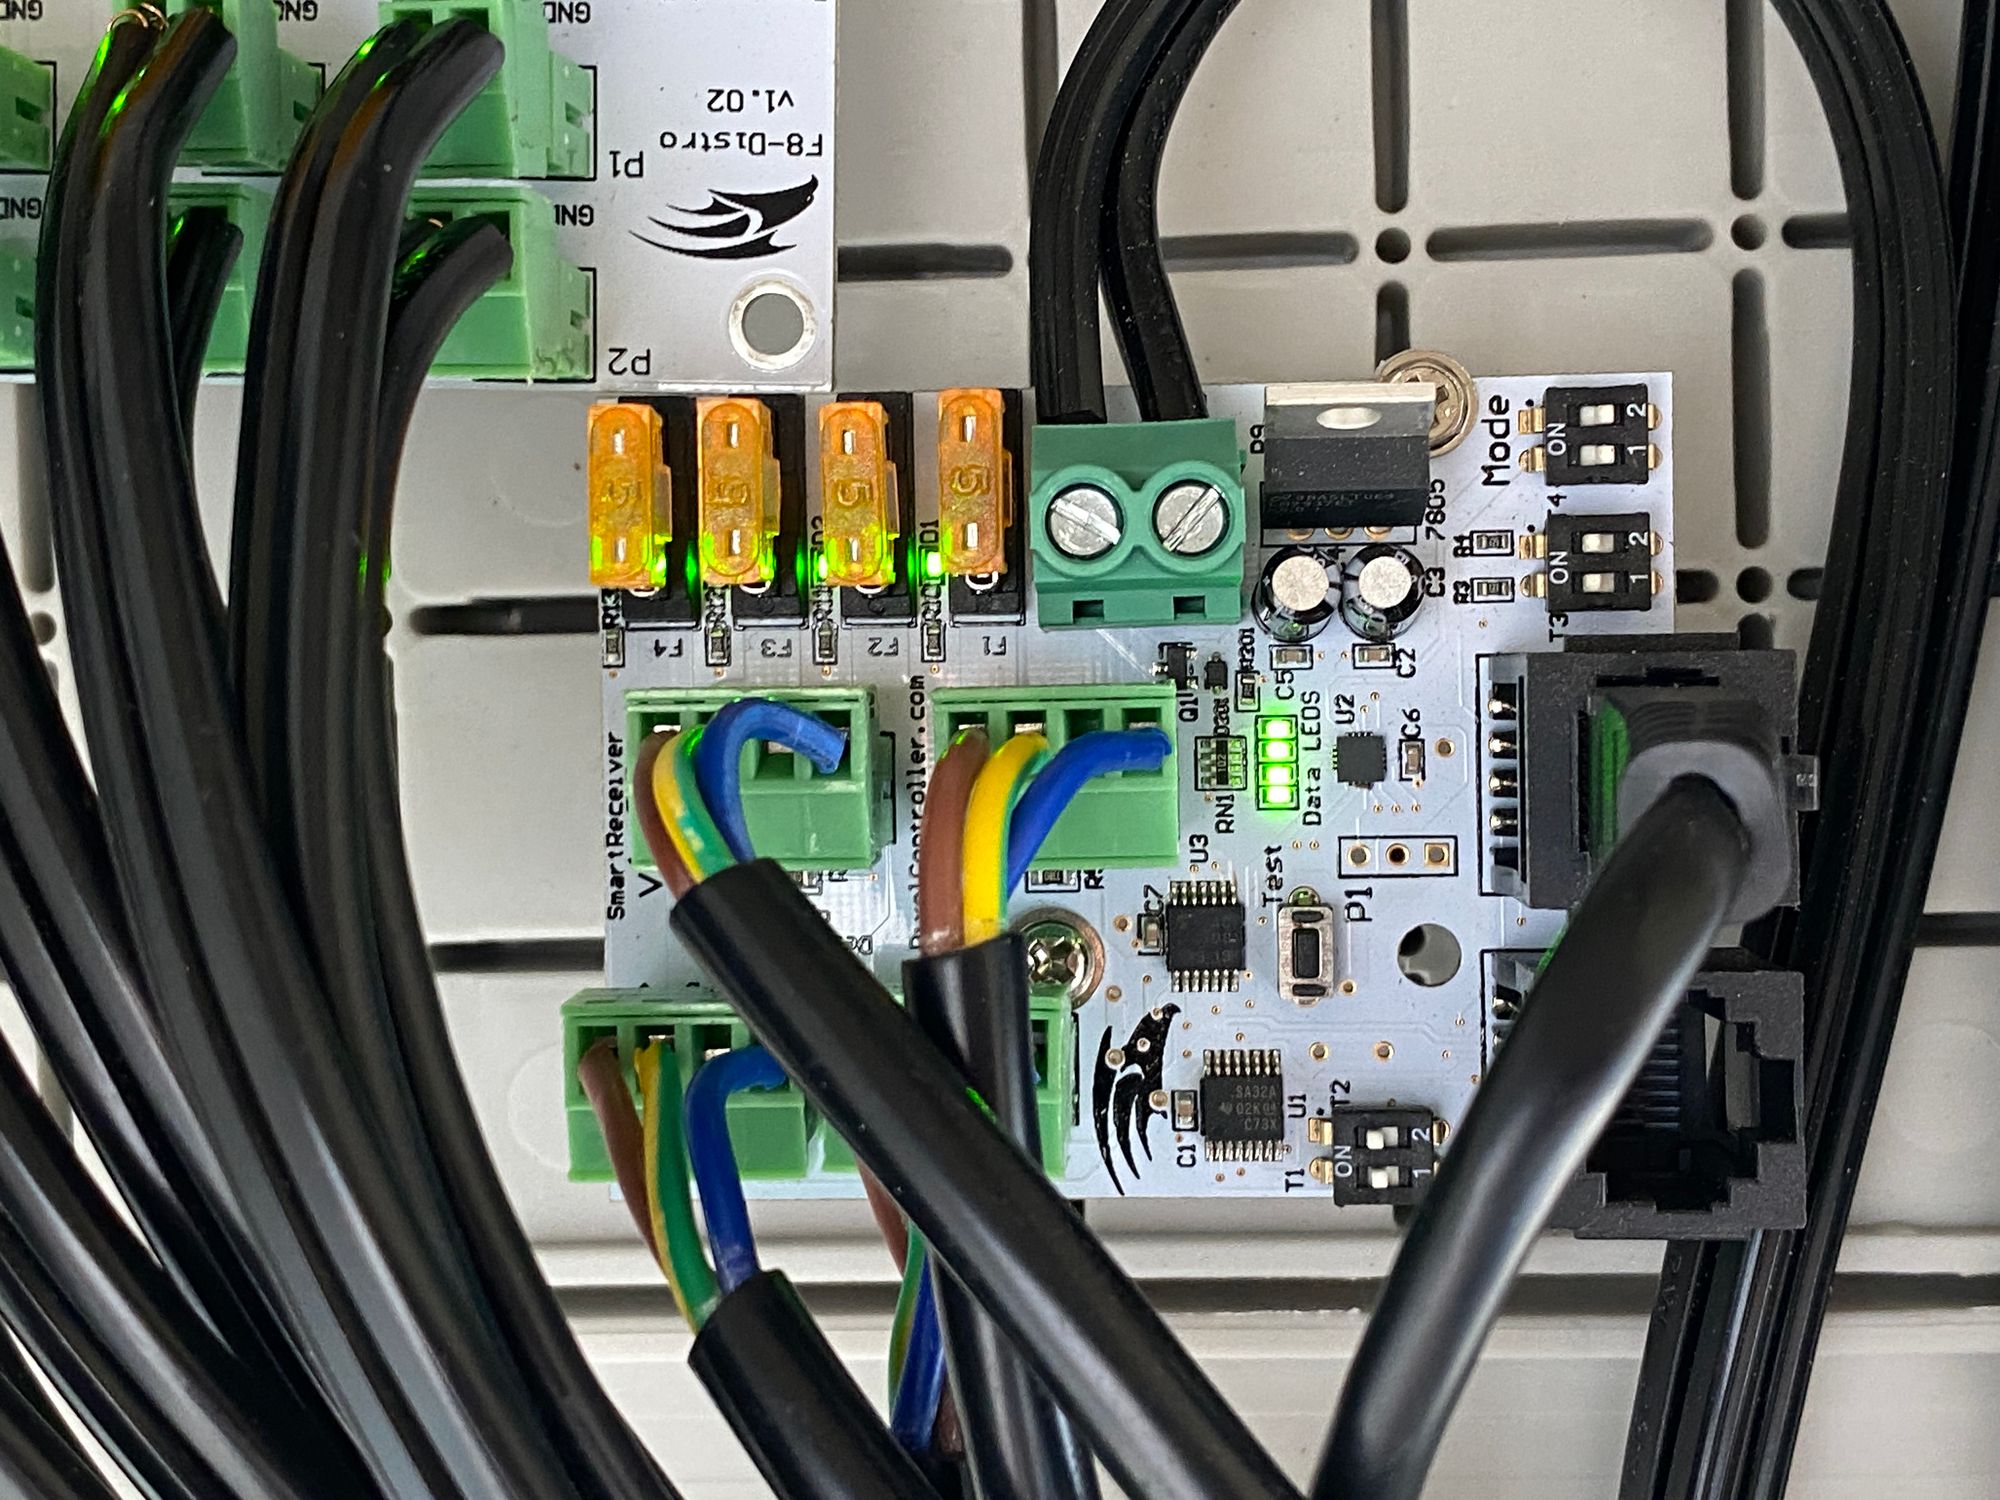
Smart Receivers are essentially remotely controlled followers to extend the number of ports available on a controller while also allowing the board to be physically closer to the pixels. Since a show can spread over large areas, positioning a smart receiver closer to distant props means you only have to run an ethernet and AC mains power to a box containing a smart receiver, a power supply, and a power distribution board, rather than 4 ports of data cables and 8 ports of power cables over long distances. I have two of these, the max that can be controlled by the F4V3.
Sequencing
All of my sequencing is done within xLights, which is a fantastic piece of software for designing shows. For the most part, I purchase sequences from various different websites, including rgbsequences.net, showstoppersequences.com, and magicallightshows.com. I also browse through the free sequences from xlightsseq.com and a dedicated Google drive for xLights sequence sharing. I also use xLights to define the various models which drive the props on the house, assign the models to ports, etc.
Miscellaneous
FM Transmitter
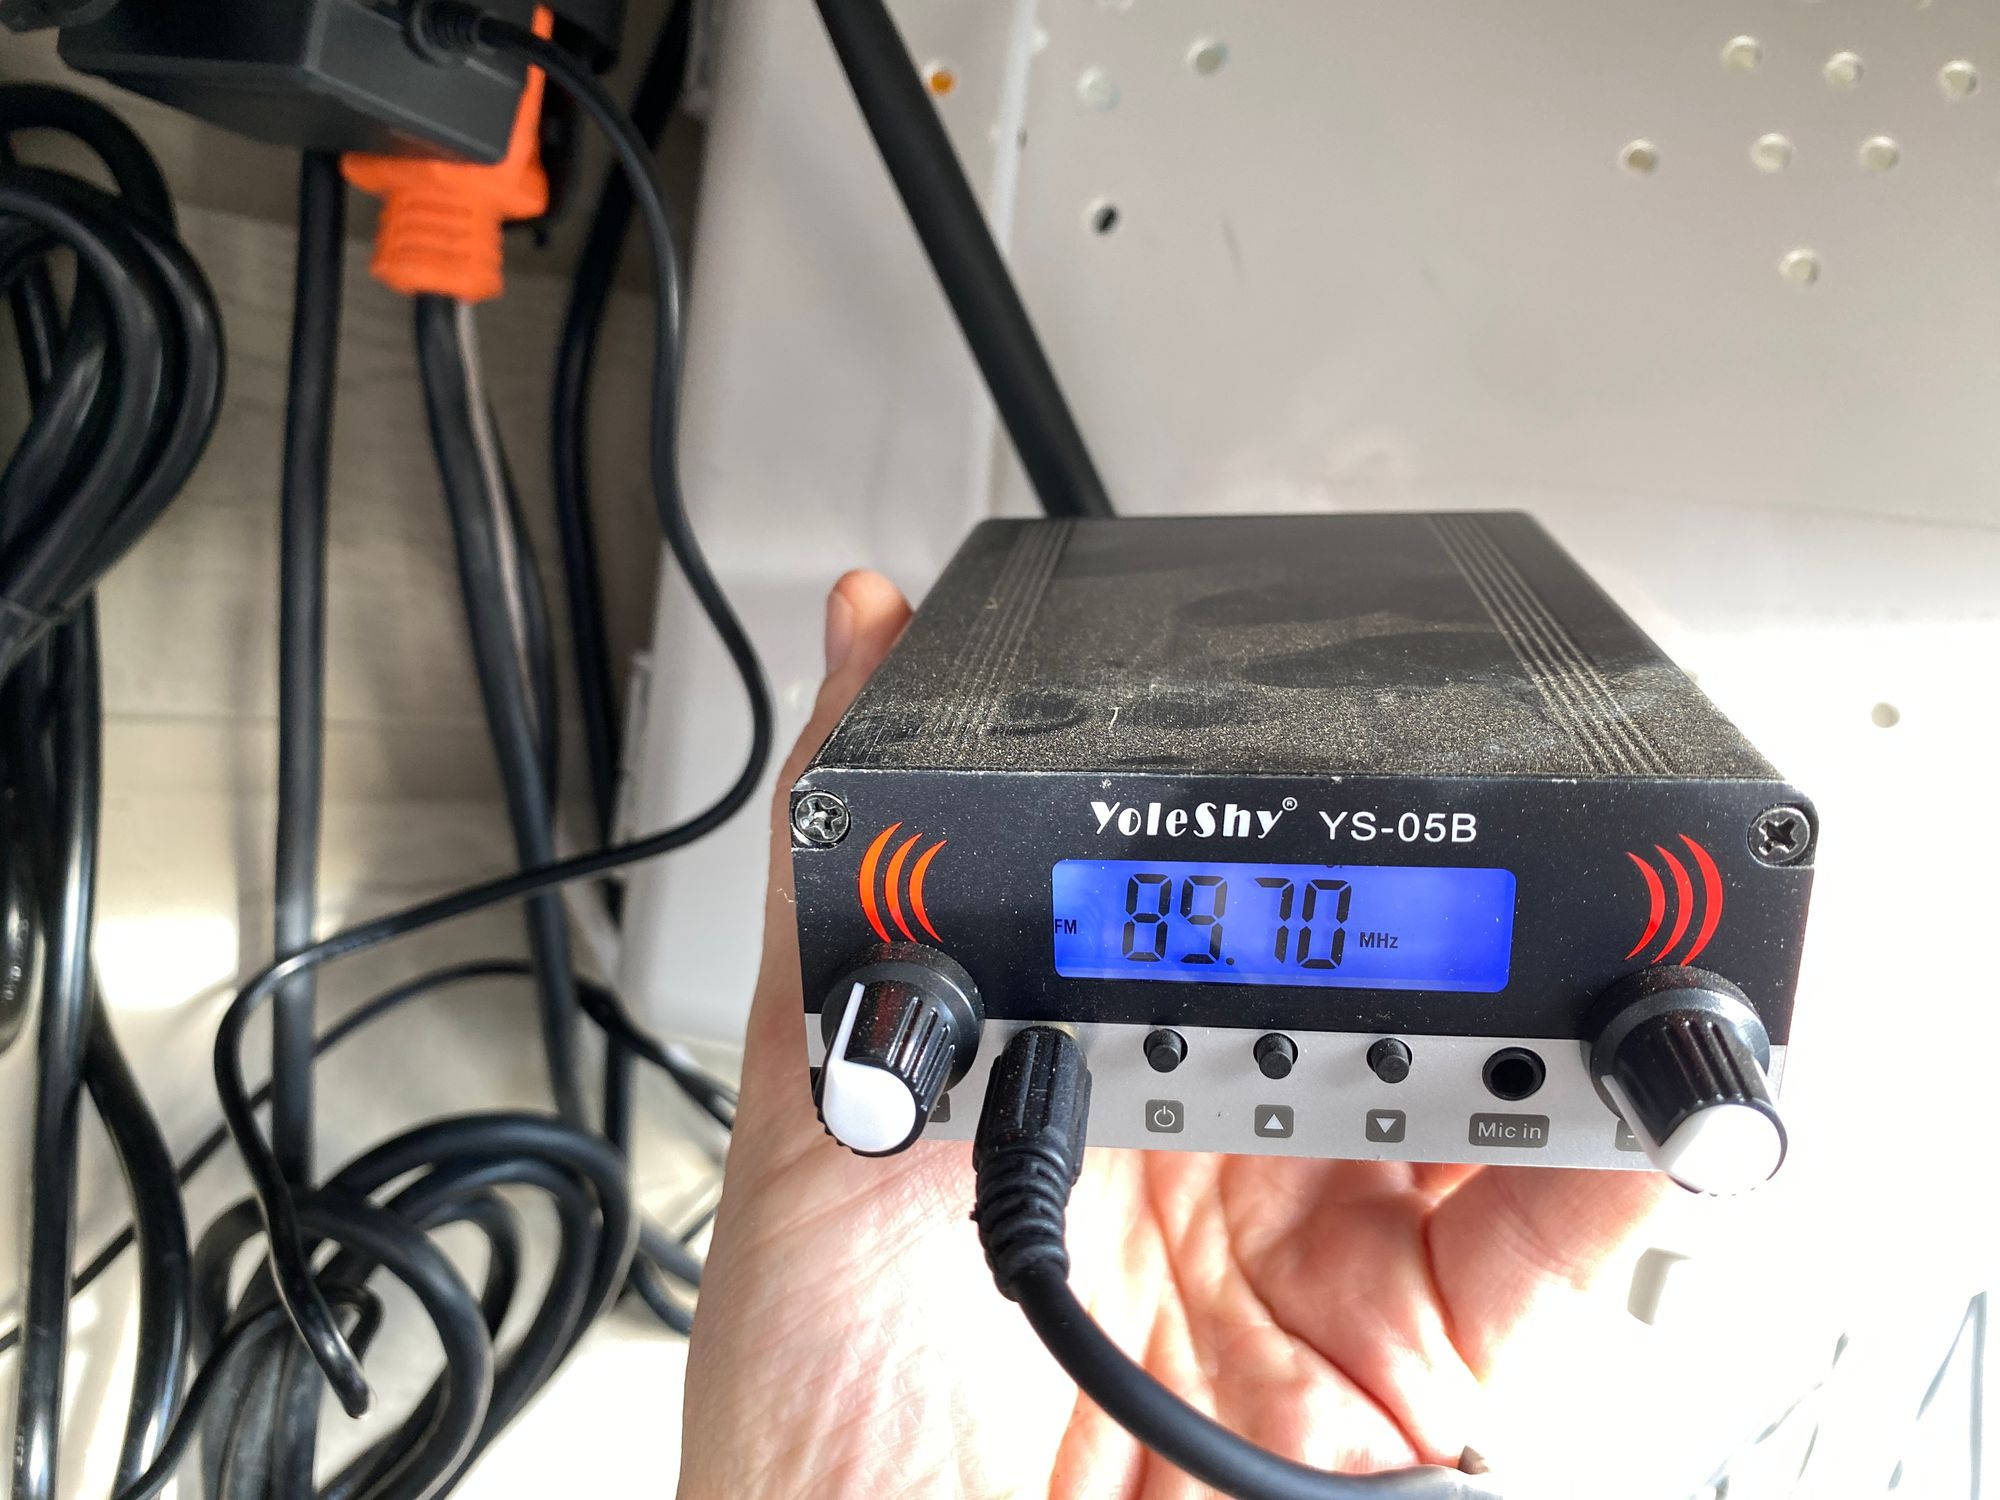
I have a cheap transmitter that accepts 3.5mm audio cable and transmits the incoming audio over a radio station that I can configure. The signal is acceptably strong; there's virtually zero distortion or static when watching the show from the intended areas, and the signal falls off after a block or two so it doesn't disrupt things too much. There are controllers which have a built in slot for an optional FM transmitter (Kulp boards, for example), but this has been working fine for me.
Weather Boxes
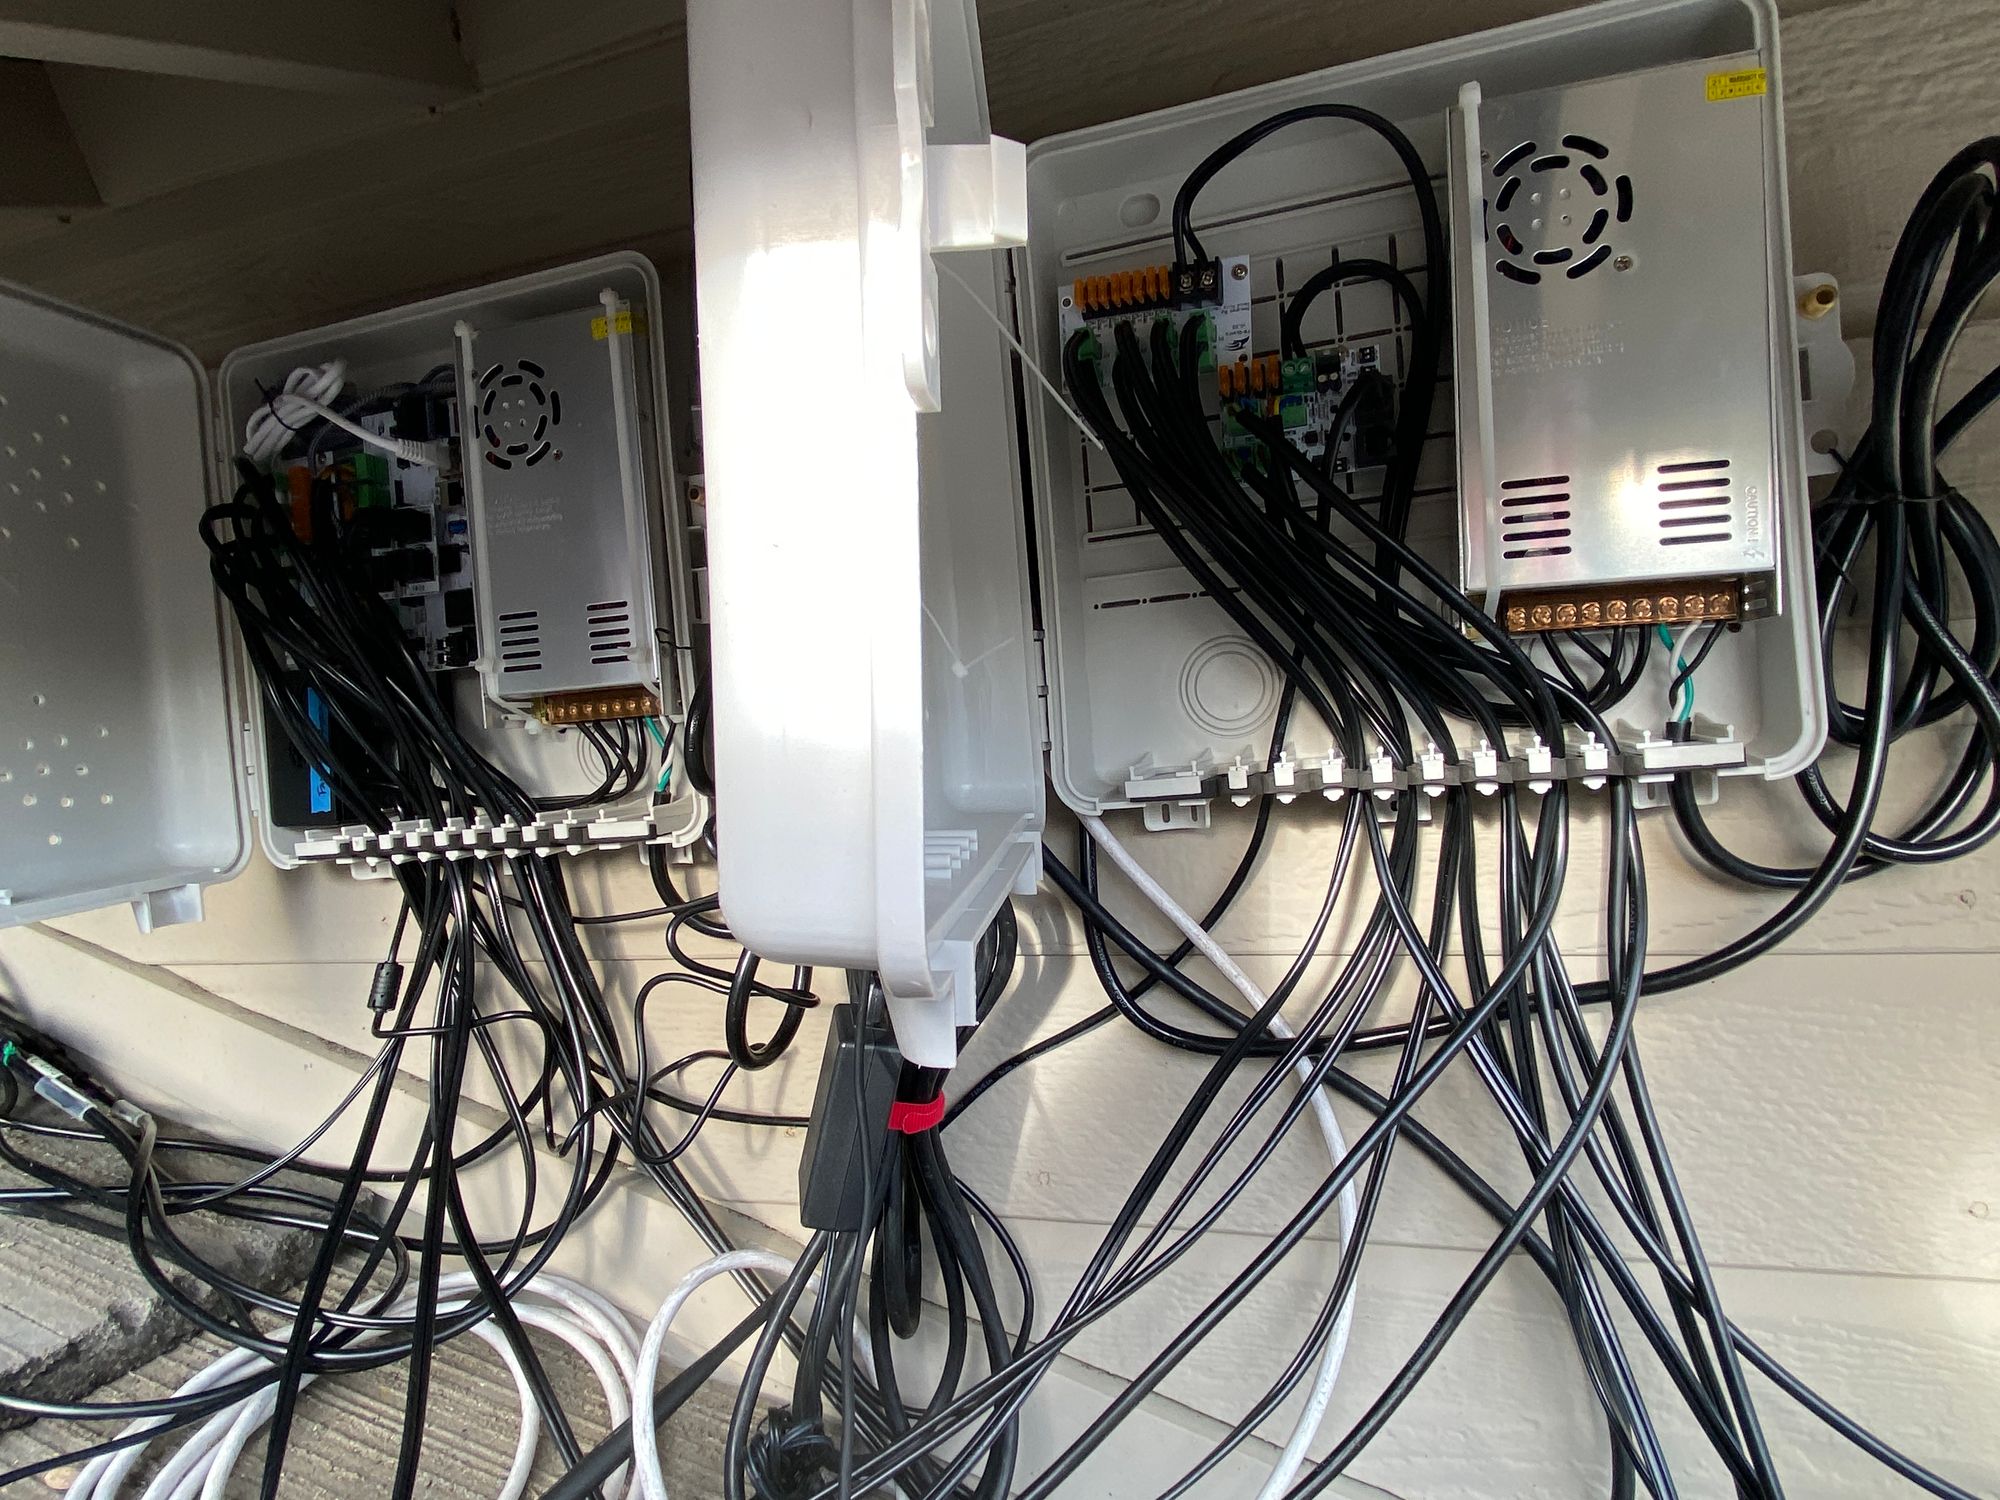
I am using the large boxes you'll typically see around irrigation to hold the various electronics. They're mounted to the walls under my eaves so they are not quite as likely to get water in them. I drilled vent holes in them with the intention of adding hoods, but then I never added the hoods, so I taped over teh holes, my reasoning being it's cold when the show is running, so the components are not in danger of overheating.
Outdoor Smart Switch
I'm using a Kasa Outdoor Smart Plug with two sockets which I have connected to Home Assistant; using the automations, I turn the power to the pixels and controllers on at sundown each night, and leave the Falcon Player on perpetually.
Wrap Up
Overall, there are a lot of moving components to my system, but it looks more complex than it actually is. For the most part, each port is duplicating the others; the props and models may be shaped differently and have different numbers of pixels, but the concept and how they get connected are all identical. As the show grows, it will necessarily butt up against limits which will require more complex expansions, but again, the concepts and execution will be carbon copies of what already exists.
From here, I'd like to start a series wherein I get more detailed about each of the props and equipment I built to highlight some of the limitations and decisions which were made along the way. Eventually, this will culminate in a full wiring diagram for the show. For the meantime, thank you for reading this far!