Here We Go a Modeling...
In recent versions, xLights has added the capability to import a 3D model of your house in order to get a better view of what the resultant display will look like. This is all well and good, but now you have to build the model. This is easier said than done, and it doesn't sound easy. Fortunately, I've been using Sketchup for years, so I figured what the hell, I'll give it a shot.
I'm not going to tell you how to build a 3D model in Sketchup. That's not this kind of blog, I have other things to do this month, etc. However, I'll give two pointers which helped me out a lot.
First: do some measuring. Get lots of measurements. Get more measurements. I promise you will likely miss some dimension and then have to go back and measure it again. When I measured, I got all the places where I figured I'd be putting lights, plus how high they were off the ground, how far away they were from other places on my house, etc. This took me some time and a bit of climbing on the roof, but it was well worth the effort.

Second: don't go too crazy on the detail. I know that sounds like it goes against what I said above. Just keep in mind that, while you want this to look proportional, this model is only ever going to be used in xLights; your audience won't see it. Therefore, if the model isn't exactly square or if the walls are an inch shorter, you are the only one who will know. This model is an approximate representation of what the lights will end up looking like.
Armed with measurements, I fired up Sketchup and built a model. It looks fine.
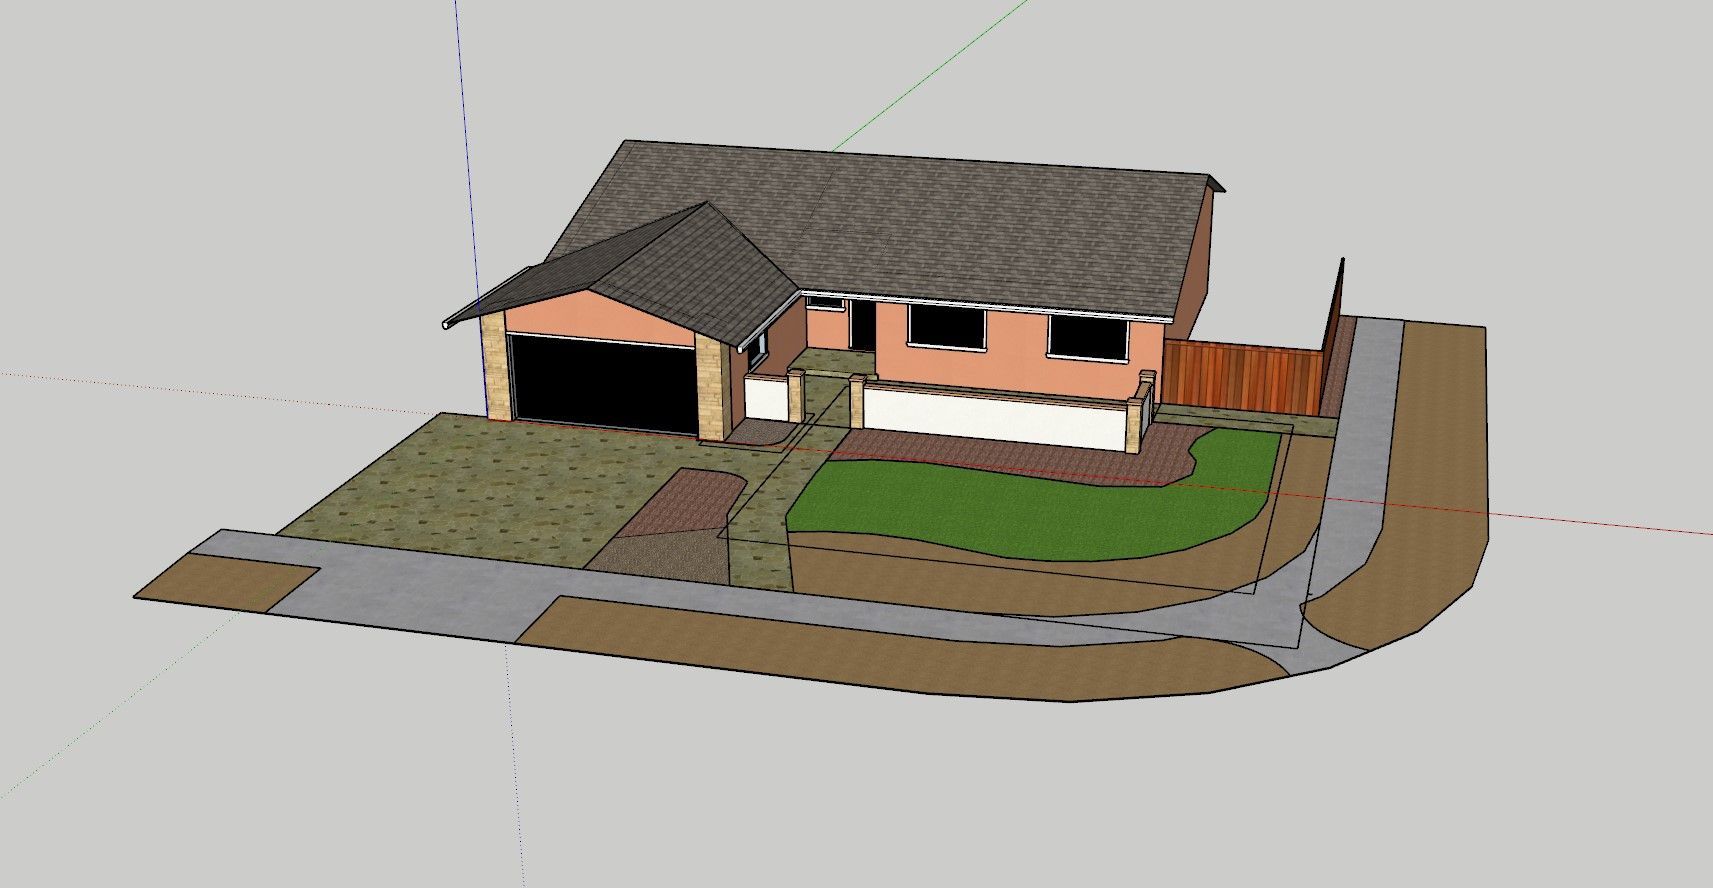
Then came the hard part: how to get it from Sketchup into xLights.
The main issue is that xLights only imports one format: .obj. And, of course, that's not one that Sketchup exports to. Well, not natively. Well, not natively in the free version, and since the paid version is a LOT of money, I'd rather find a way around it.
Some googling led me to a series of plugins which will export to .obj for me. Great! Installed the first one I tried (LIPID Obj exporter), got an .obj file, copied it to my xLights show directory, then imported it using the "Add Obj" button.
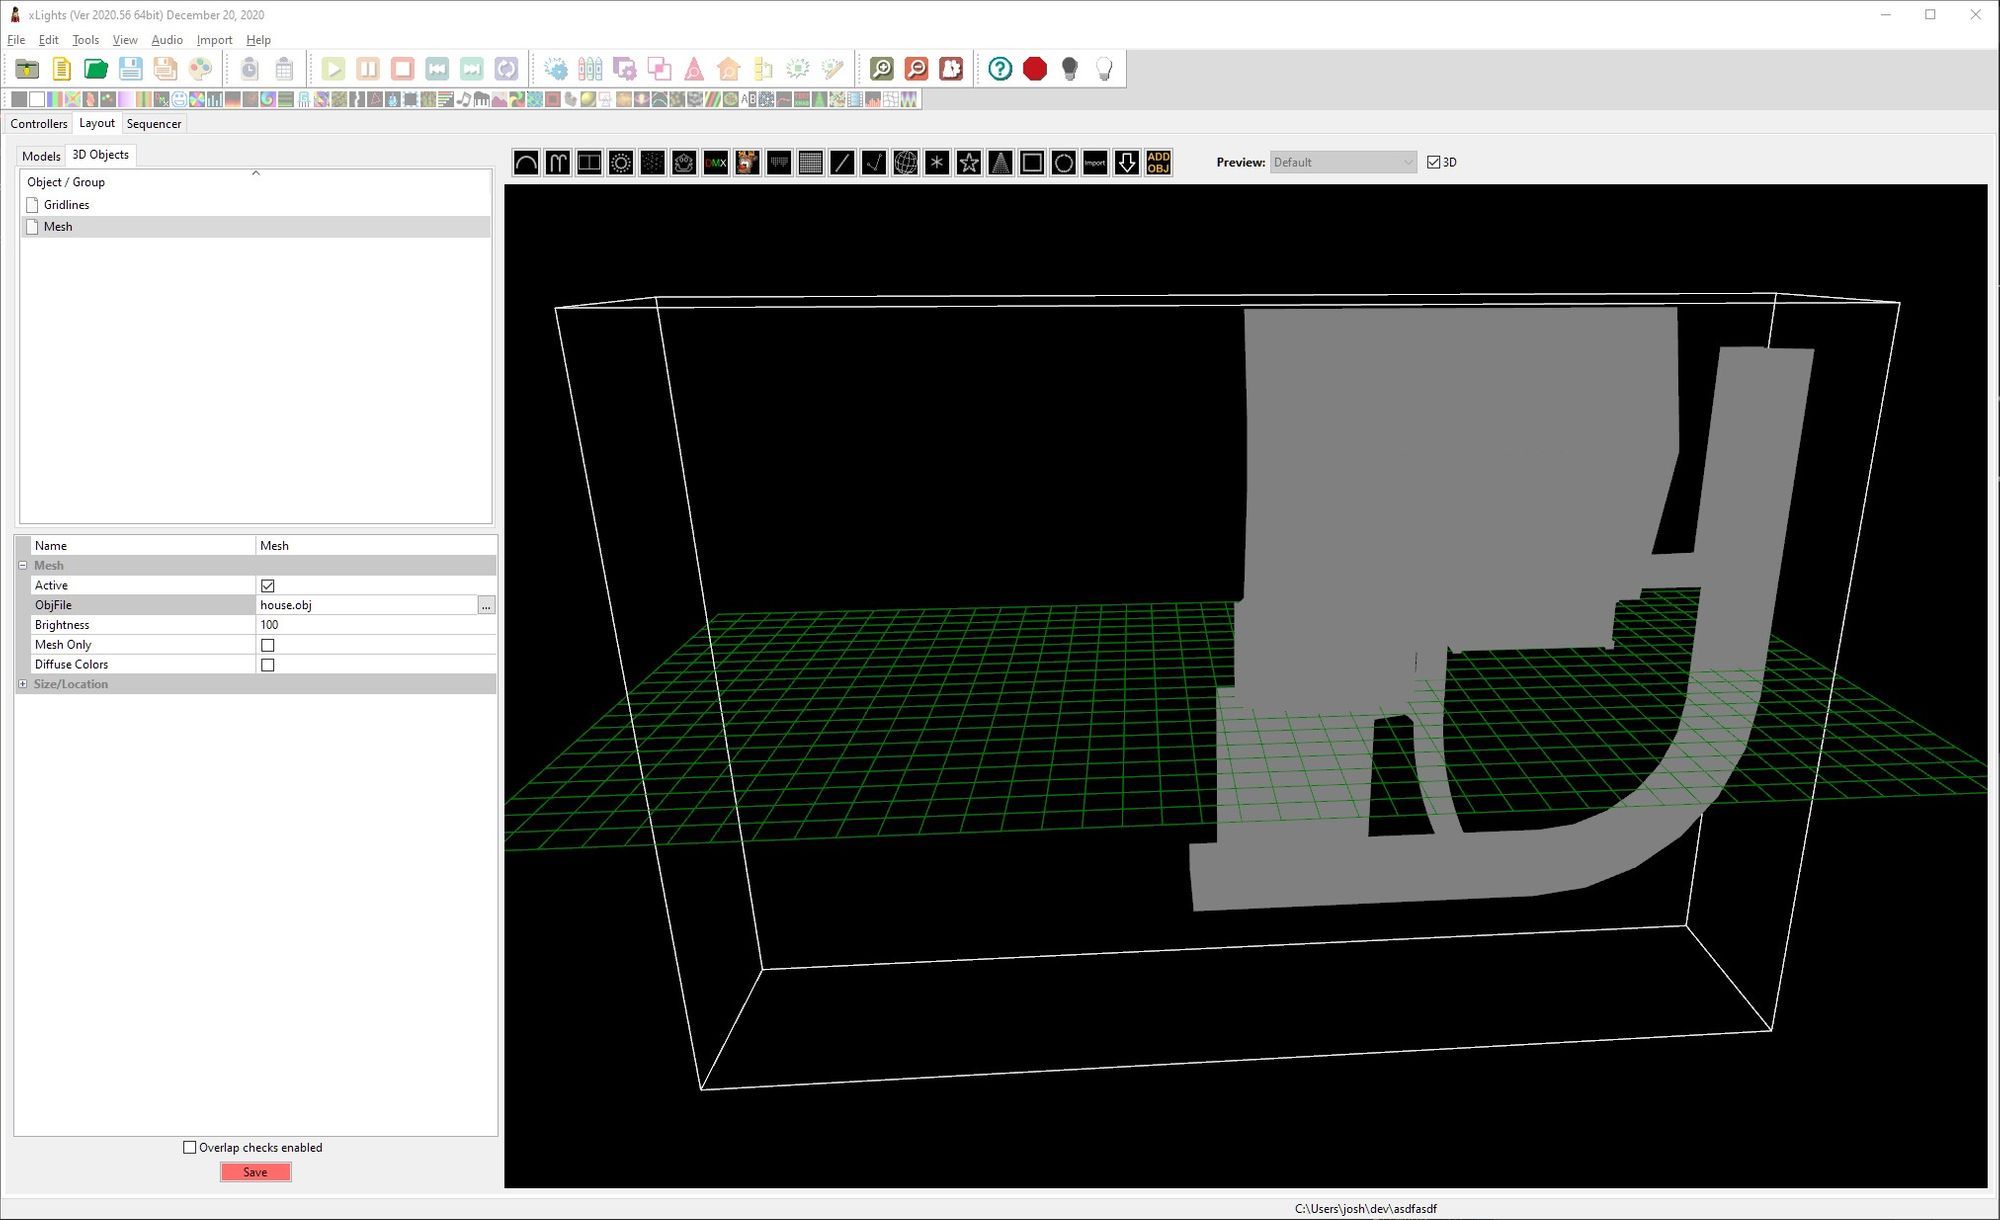
Uhhhh, this is hot garbage. So, turns out that there are quite a few things this plugin doesn't do, one of which is rotate the model. Fine, I can manually rotate. But still, there are no textures; it's just a grey blob. I can do better.
Enter QuadFace Tools. This is a series of plugins (if I recall correctly, it is a paid program with a trial period), one of which does .obj export. Fine. Install that, run the plugin, get an .obj file, move that to my xLights directory, and try again. Now I have an option to swap the y axis, and to export textures. Hmmm, those both sound promising.

Same shit, but now I've wasted 45 minutes.
Okay. So, I also hear that you can use Blender to export .obj and that Blender reads .dae files which Sketchup exports. Hmmmm... never used Blender, but I've also never used xLights before today, so here goes. Download Blender, install, export from Sketchup, import into Blender.
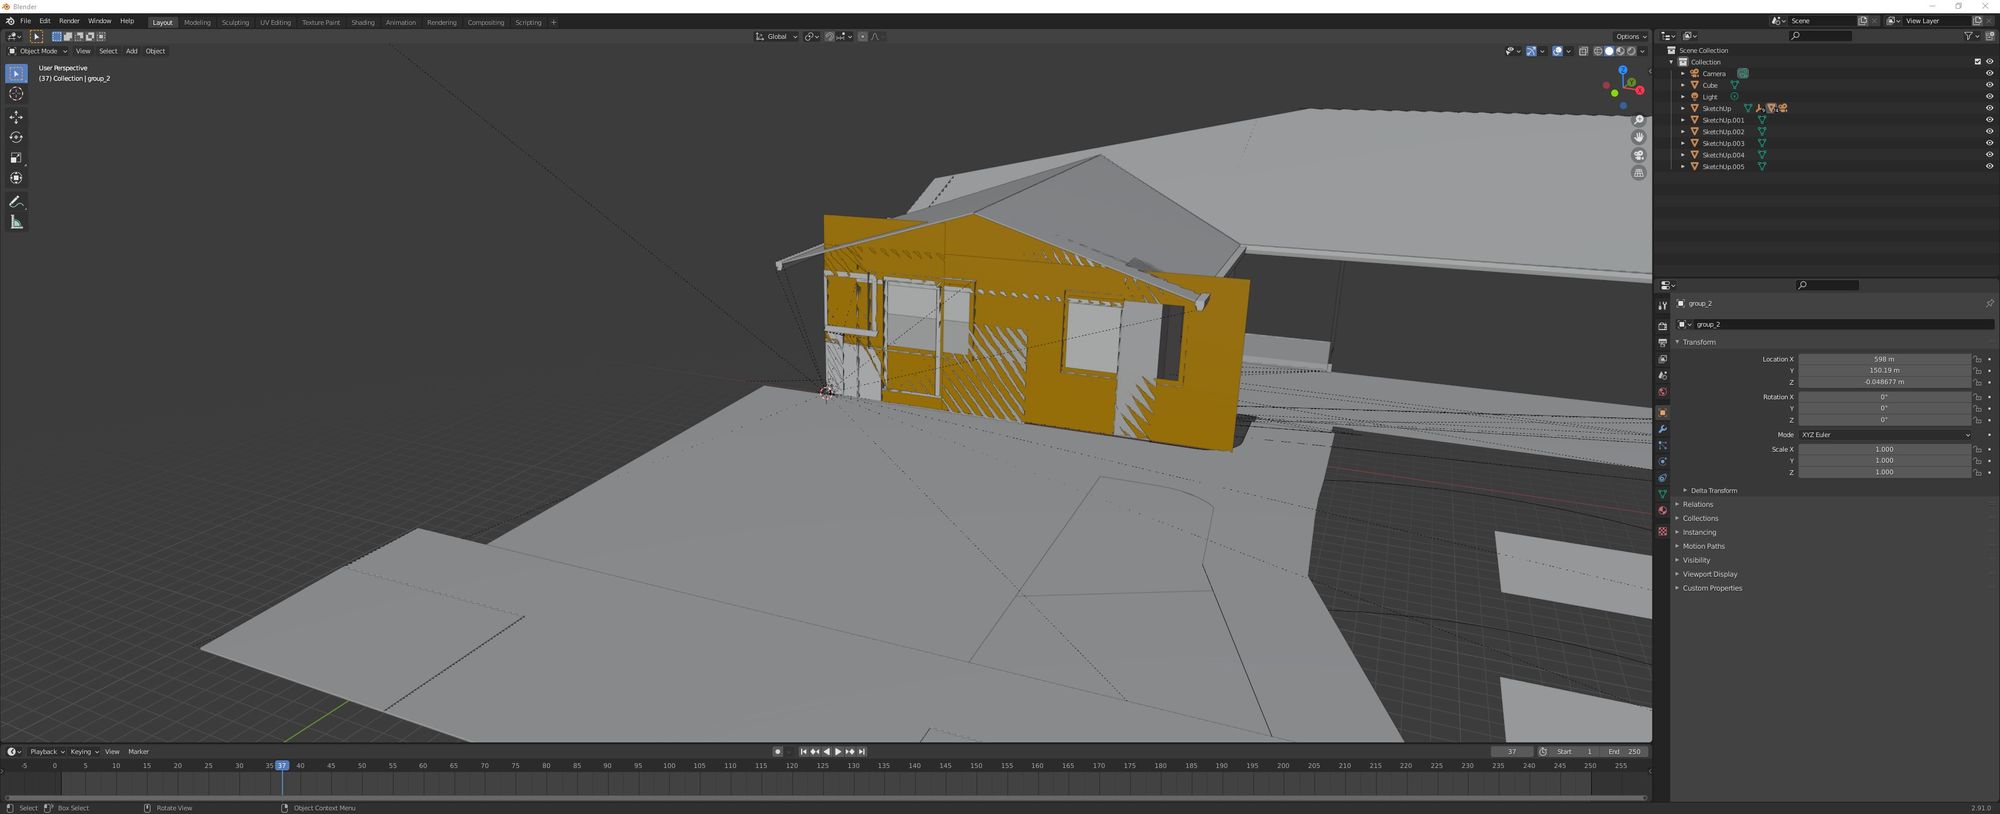
Ummm, all my walls are in one place, but everything else is where it should be. Plus, I have no idea how to move things around. Okay, this is not going to work.
Time to bring out the big guns.
There is a free trial version. I will open my Sketchup file there, export the .obj, and never open the pro version again.
Except, apparently, there is an art to how the textures are applied. First off, I was using both colors and textures in the model; colors for the paint, textures for the other stuff. Turns out, when I import into xLights, it doesn't understand the colors and needs a texture file. So, I go and turn the colors into texture files, reapply them in Sketchup, and export again. But this time, the textures were applied to components which had groups nested within them, so the texure didn't work. So I had to go, explode all my nested components, reapply textures, re-export them, and import into xLights. But hey, success!
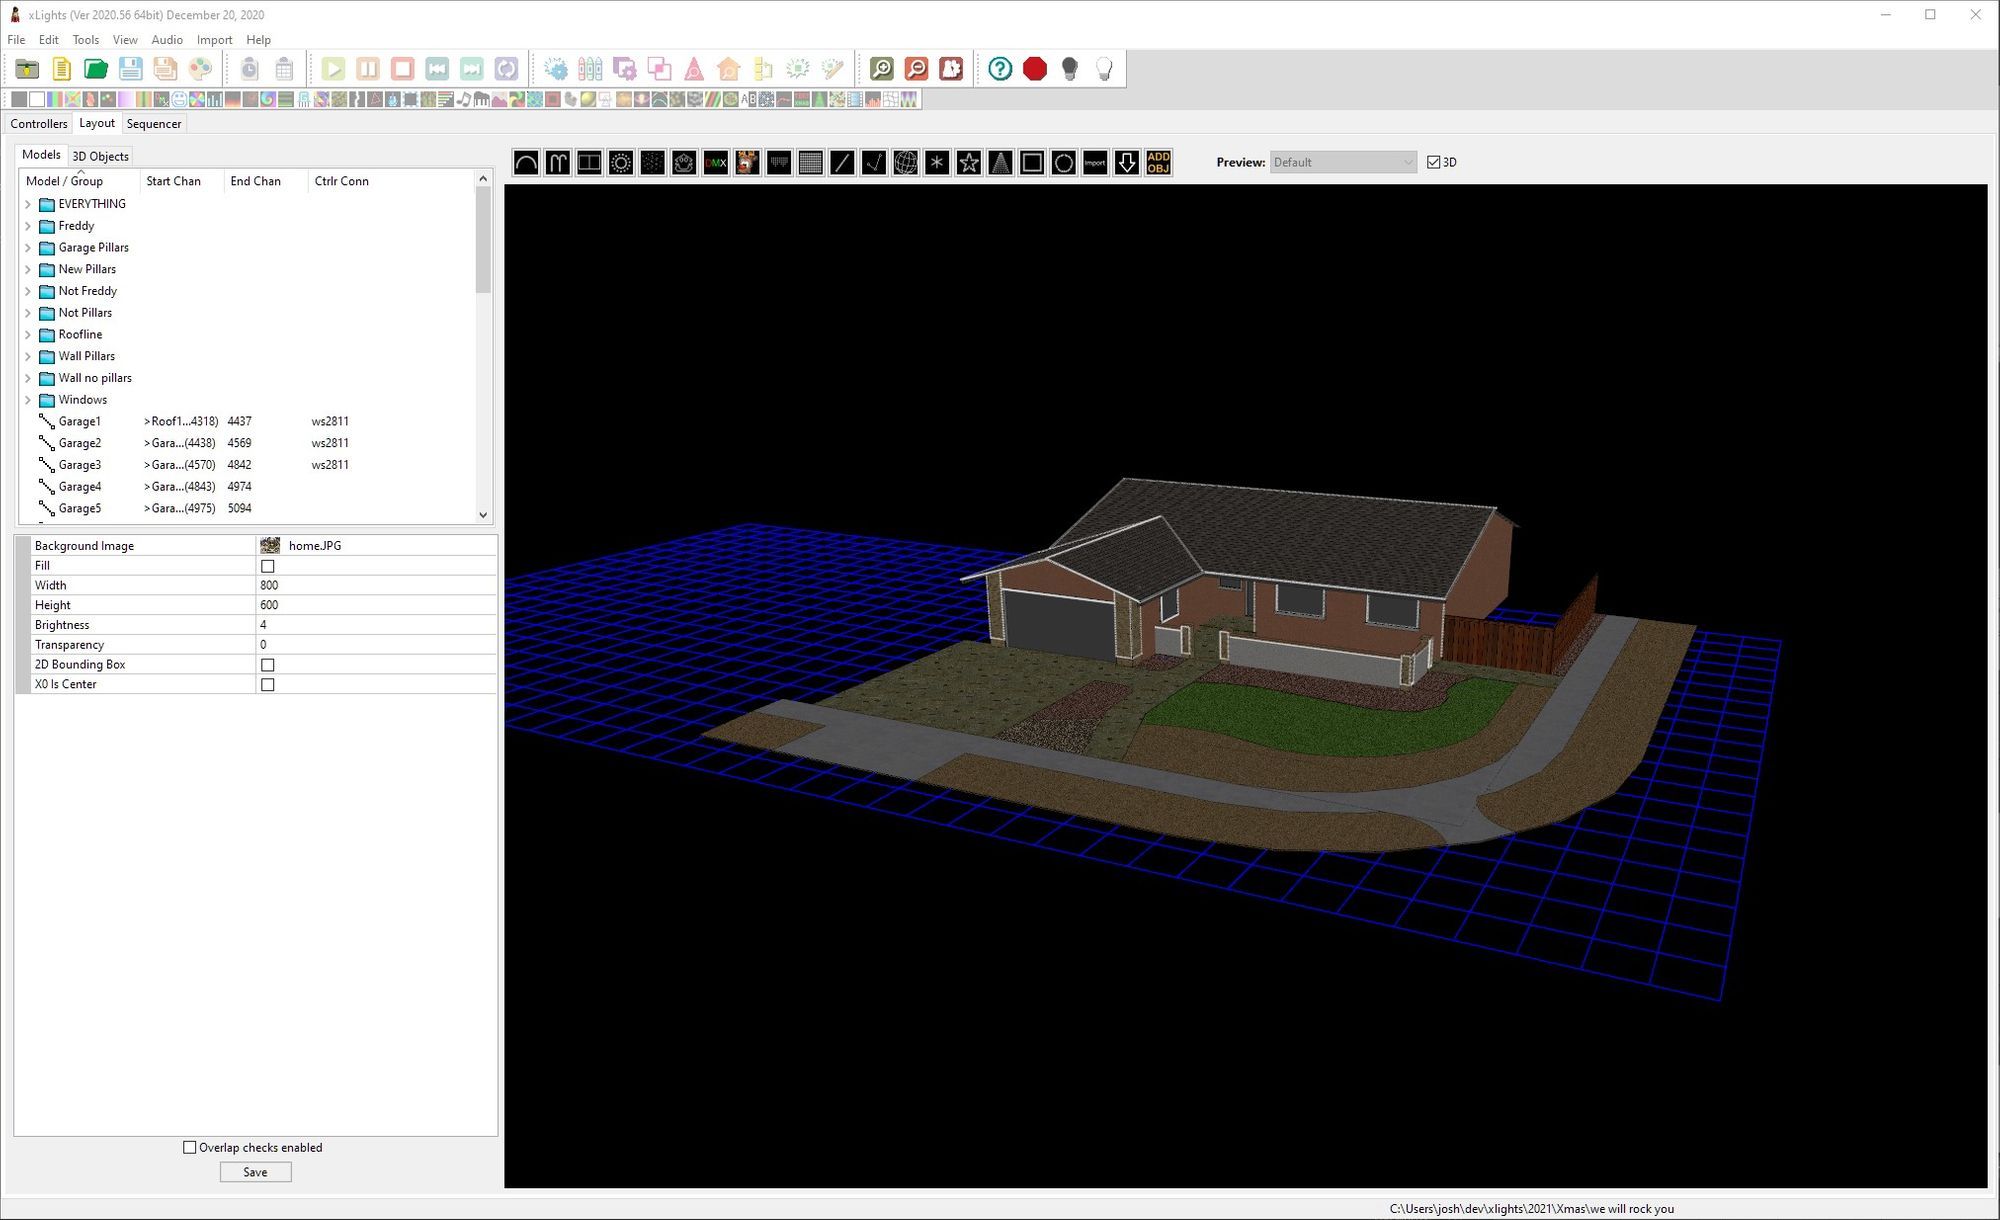
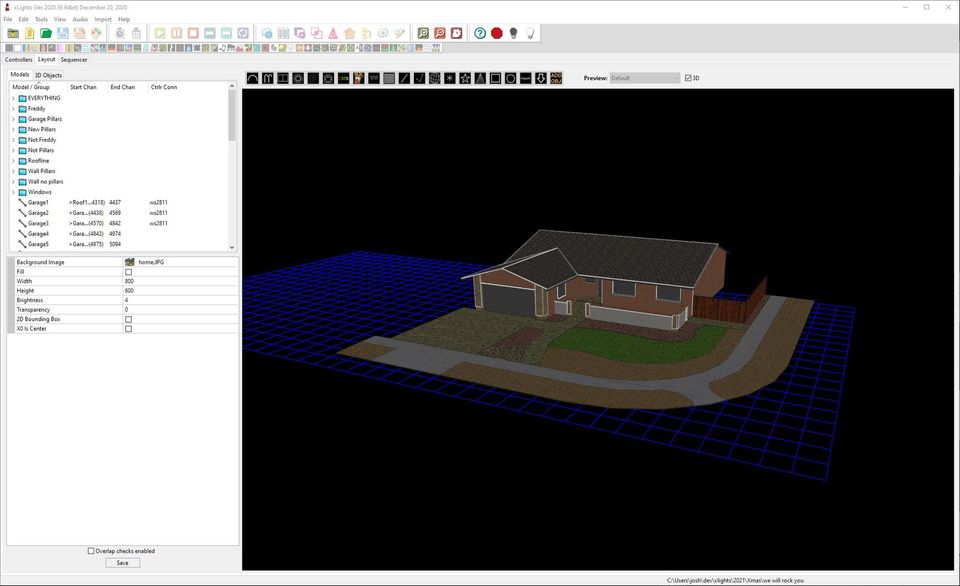
This is how it looks after I've added a bunch of models to the house (lights on the edges, mostly), which I'll get into a bit more in a later post. But for now, building a model and importing into xLights is complete, and it only took me a GREAT deal of frustration and about a dozen hours (two hours maybe to build the model, at least ten hours to get a good model in xLights).
Yeah, remember rule 2? I sooooooo could have been done after rotating the first import; it was functionally usable.
Hell, I don't even really need to use 3D since I later found that all the effects are rendered in 2D anyway. But I digress.
So, tl;dr:
- use Sketchup Pro trial to export .obj
- make sure that the textures are applied to the groups
- do as little nesting as possible
- every material in the model needs to have a texture, not just a color, in order to be properly imported.
